×
- Hello
- Login or Register
- Quick Links
- Live Chat
- Track Order
- Parts Availability
- RMA
- Help Center
- Contact Us
- Shop for
- Nissan Parts
- Nissan Accessories
My Garage
My Account
Cart
Genuine 2001 Nissan Quest CV Boot
Axle Boot- Select Vehicle by Model
- Select Vehicle by VIN
Select Vehicle by Model
orMake
Model
Year
Select Vehicle by VIN
For the most accurate results, select vehicle by your VIN (Vehicle Identification Number).
4 CV Boots found

2001 Nissan Quest Repair Kit-Dust Boot,Outer
Part Number: 39241-2Z325$99.33 MSRP: $136.82You Save: $37.49 (28%)Ships in 1-2 Business DaysProduct Specifications- Other Name: Dust Boot Kit-Repair,Outer. This item subject to a 40% restocking fee if returned.; Boots, Outer Boot
- Position: Outer
- Lookup Code: 39155K
- Item Weight: 1.90 Pounds
- Item Dimensions: 6.8 x 6.0 x 5.7 inches
- Condition: New
- Fitment Type: Direct Replacement
- SKU: 39241-2Z325
- Warranty: This genuine part is guaranteed by Nissan's factory warranty.

 Product Specifications
- Other Name: Dust Boot Kit-Repair,Inner; Boot, Boots, Inner Boot
- Position: Inner
- Lookup Code: 39156K
- Item Weight: 1.30 Pounds
- Item Dimensions: 6.6 x 5.9 x 5.7 inches
- Condition: New
- Fitment Type: Direct Replacement
- SKU: 39741-0B025
- Warranty: This genuine part is guaranteed by Nissan's factory warranty.
- Product Specifications
- Other Name: Dust Boot Kit-Repair,Outer; Boot, Boots, Outer Boot
- Position: Outer
- Lookup Code: 39155K
- Item Weight: 1.90 Pounds
- Item Dimensions: 6.7 x 6.0 x 6.0 inches
- Condition: New
- Fitment Type: Direct Replacement
- SKU: 39241-0B025
- Warranty: This genuine part is guaranteed by Nissan's factory warranty.
- Product Specifications
- Other Name: Dust Boot Kit-Repair,Inner; Boots, Inner Boot
- Position: Inner
- Lookup Code: 39156K
- Item Weight: 1.30 Pounds
- Item Dimensions: 6.7 x 5.9 x 5.6 inches
- Condition: New
- Fitment Type: Direct Replacement
- SKU: 39741-2Z325
- Warranty: This genuine part is guaranteed by Nissan's factory warranty.
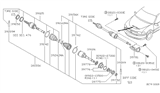
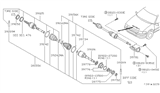
2001 Nissan Quest CV Boot
Committed to delivering top-notch quality at affordable prices, our website is your go-to source for OEM 2001 Nissan Quest CV Boot worldwide. Each of our genuine 2001 Nissan Quest CV Boot come with a manufacturer's warranty, so rest assured, quality and cost are covered. With us, you're making a smart choice that stands the test of time.
2001 Nissan Quest CV Boot Parts Questions & Experts Answers
- Q: How to overhaul CV joints and replace CV boots, including the steps for reassembly and installation on 2001 Nissan Quest?A: Likewise with any CV joint wear that mandates an overhaul, such as worn boots, it is better to explore all conceivable options before beginning the process. It should also be noted that, in some cases, completely rebuilt driveaxles can be purchased on an exchange basis, which is extremely helpful and time-saving. If the first option is taken it is critical to check on the price and accessibility of spare parts before proceeding. To begin with, you have to pull out the drive axel and then ensure that it is clamped in a vise using some soft jaws. Trim off the boot seal retaining clamps and slide the boot towards the center and use a clean rag to wipe off the old grease. Orient the end of the housing with the chamfers facing upwards and undo the front retaining ring if installed and pull out the ball-and-cage assembly from the housing. Further retract the inner race to remove the circlip and to Comes off the inner bearing assembly. Before fitting a new boot, dismantle, clean and examine the bearing assembly, indicating the position of the inner race and cage for reassembly. Gently ease the balls out of the cage and turn the inner race to position it for withdrawal. Scrub out all the old grease from the anchoring housing and the bearing, and look for signs of wear Thereafter, put a layer of CV joint grease to retain the balls while reconstructing. Begin reassembly by fitting the inner race into the cage with matchmarkings facing the same way and then forcing the balls into the corresponding locates on the cage. Since boot's hooks engage with the splines on the axleshaft, the boot should be slipped onto the axleshaft after it has been taped, but without the tape touching the boot hooks, before the clamp is fitted. Insert the new inner race and cage assembly with the bulge on the side of the axleshaft end and then fit the new circlip as well on this end. It is recommended to pack the outer race and the boot with CV joint grease by applying the grease until it is full and do the same to the inner race and cage assembly. Position the outer race over the inner race and if used, place the wire ring retainer into position and ensure that the boot is properly positioned and it should be of correct length; tighten the clamps. Tighten the lug nuts to set the same amount of pressure in the boot, using your dirty screw driver without its damaging, then secure the boot clamp, which can be of any style. Finally, install the driveaxle. For the outer boot replacement, first of all, take off the inner joint and boot MP, mentioning that some paint marks must be made on the dynamic damper and the driveshaft to install them correctly. Bend the clamps to level off and eject the outer boot, and clean the housing and bearing assembly with a properly certified cleaning solvent with the help of compressed air while wearing safety glasses. To do this, straighten the outer CV joint to slideway; then reveal the bearings, inner race, and accurately cut the cage, and replace worn or damaged CV joint parts. Grease the inner race end and cage assembly with the CV joint grease after that taping the axle splines, the new boot must be placed well before tightening the clamps. Lubricate, position and slip the outer CV joint and boot to the driveaxle then fix the appropriate length of the driveaxle boot before proceeding to mount the inner CV joint and boot onto the axleshaft then finally the driveaxle.
