×
- Hello
- Login or Register
- Quick Links
- Live Chat
- Track Order
- Parts Availability
- RMA
- Help Center
- Contact Us
- Shop for
- Nissan Parts
- Nissan Accessories
My Garage
My Account
Cart
Genuine Nissan 240SX Brake Master Cylinder
- Select Vehicle by Model
- Select Vehicle by VIN
Select Vehicle by Model
orMake
Model
Year
Select Vehicle by VIN
For the most accurate results, select vehicle by your VIN (Vehicle Identification Number).
8 Brake Master Cylinders found


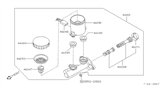
Nissan 240SX Brake Master Cylinder
Nissan 240SX Brake Master Cylinder varies in many models of Nissan 240SX, which offers heavy and long-lasting car braking performance. This Brake Master Cylinder effectively interprets the pressure applied by the driver's foot into hydraulic pressure to enable the vehicle make a safe and efficient stop. The Nissan 240SX Brake Master Cylinder is dual circuited, this means that even if one circuit gets damaged, the other will remain functional, which is important in any car especially a car meant for high speed. Maintenance and examination of the Brake Master Cylinder should be done frequently with the goal that normal issues like leakage of fluids and internal brake system may not occur and affect the braking system. In the car that is noted for its lightweight and well-sorted chassis, the Brake Master Cylinder provides a consistently rock-solid performance making the Nissan 240SX the car of choice for drift racers and tuners. Suitability to factors of Nissan 240SX both hatchback and coups makes it easy for the enthusiasts have a component that they can depend on. Also, the hydraulic fluid of Brake Master Cylinder can be easily accessed depending on whether the MC has an internal or external reservoir, thus making it practical. In conclusion, the Nissan 240SX Brake Master Cylinder in the automotive market is highly recommended and plays an important role in assuring stability and security of the vehicle, thereby becoming one among the highly important parts of the Nissan 240SX series.
If you need any OEM Nissan 240SX Brake Master Cylinder, feel free to choose them out of our huge selection of genuine Nissan 240SX Brake Master Cylinder. All our parts are offered at unbeatable prices and are supported by the manufacturer's warranty. In addition, we offer quick shipping to have your parts delivered to your door step in a matter of days.
Nissan 240SX Brake Master Cylinder Parts Questions & Experts Answers
- Q: How to remove and install the Brake Master Cylinder on Nissan 240sx?A:Before changing the Brake Master Cylinder, you should first disconnect the ground cable of your car and then clean the exterior of the Brake Master Cylinder, particularly the cap and the fluid couplings. Remove the major working fluid tubes and cover the open ends of the tubes to prevent accumulation of dirt. If there is a wiring harness of a fluid level sensor, remove the wiring harness of the Brake Master Cylinder. Following that, the tubes connecting the brake fluid should be disconnected and to prevent entry of dirt, the ends should be covered. Unbolt the fire-wall or Brake Booster if fitted and take the Brake Master Cylinder out of the vehicle. The Brake Master Cylinder assembly should be bench bled, then reinstalled into the vehicle when all brake hose connections have been made and the fluid level sender wiring if equipped. Pour brake fluid into the reservoir, continue to bleed the brake system and turn the brake system while doing so. DOT 3 brake fluid should be used since boiling will lead to brake failure. But brake pedal free play is determined by using an adjustable pushrod, and if the pushrod is not adjustable, shims are used. For bleeding, fitting the Brake Master Cylinder into a vise, connect two hoses on the outlets "fluid" into the tank, and pour brake fluid into the tank. Depress the pushrod with a wooden dowel a few times gently to eliminate the air from the mixture, then cap the outlets and take off the bleeding tubes. For overhaul, remove the Brake Master Cylinder assembly and clean all parts with clean brake fluid; the cylinder or piston should be replaced if the clearance is more than 0.15mm. During the assembly, grease all the parts with the new, clean brake fluid; you might also wish to use brake rebuilding kits for your convenience. Where more than skeptical about the condition of the overhaul, it is better to change the whole assembly for a new one.


