×
- Hello
- Login or Register
- Quick Links
- Live Chat
- Track Order
- Parts Availability
- RMA
- Help Center
- Contact Us
- Shop for
- Nissan Parts
- Nissan Accessories
My Garage
My Account
Cart
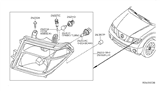
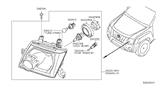
Genuine Nissan Frontier Headlight
Headlamp- Select Vehicle by Model
- Select Vehicle by VIN
Select Vehicle by Model
orMake
Model
Year
Select Vehicle by VIN
For the most accurate results, select vehicle by your VIN (Vehicle Identification Number).
24 Headlights found


Nissan Frontier Passenger Side Headlight Assembly
Part Number: 26010-ZL40B$138.62 MSRP: $223.91You Save: $85.29 (39%)Ships in 1-3 Business Days

Nissan Frontier Driver Side Headlight Assembly
Part Number: 26060-ZL40B$138.62 MSRP: $223.91You Save: $85.29 (39%)Ships in 1-3 Business Days


Nissan Frontier Driver Side Headlight Assembly
Part Number: 26060-EA525$114.15 MSRP: $175.89You Save: $61.74 (36%)Ships in 1-2 Business Days


Nissan Frontier Passenger Side Headlamp Assembly
Part Number: 26010-EA525$114.15 MSRP: $175.89You Save: $61.74 (36%)Ships in 1-3 Business Days


Nissan Frontier Passenger Side Headlight Assembly
Part Number: 26010-7B425$136.60 MSRP: $210.47You Save: $73.87 (36%)Ships in 1-2 Business Days


Nissan Frontier Driver Side Headlight Assembly
Part Number: 26060-ZL40A$138.62 MSRP: $223.91You Save: $85.29 (39%)Ships in 1-2 Business Days


Nissan Frontier Passenger Side Headlight Assembly
Part Number: 26010-ZL40A$138.62 MSRP: $223.91You Save: $85.29 (39%)Ships in 1-3 Business Days
Nissan Frontier Driver Side Headlight Assembly
Part Number: 26060-3S525$134.65 MSRP: $204.35You Save: $69.70 (35%)Ships in 1-2 Business Days


| Page 1 of 2 |Next >
1-20 of 24 Results
Nissan Frontier Headlight
The Nissan Frontier Headlight allows vehicle operators to see clearly while also making their vehicle visible to other road users, using low and high beam patterns. Early models of Frontier trucks utilized halogen Headlight assemblies where a heated tungsten filament inside halogen gas created an inexpensive light source but had a limited lifespan. Subsequently, the use of composite Headlight housings that were molded to the body helped improve the car's aerodynamics while also tucking in the turn and parking lamps. Furthermore, the inclusion of projector optics allowed for a sharper beam. As technology progresses, this pickup gains LED Headlight systems that emit a bright white glow with far lower power draw and years-long durability, plus optional xenon HID setups that ignite xenon gas for an even more intense blue-white output without a filament. Nissan is relying on clear plastic lenses shaped for appeal and airflow. These lenses dull over time due to the sun, debris, and weather. This diminishes performance until they are refinished or replaced. Modern Nissan designs have improved Frontier lights, making certain all Headlight designs prioritize efficiency and longevity while creating a bold stance to keep the night journey secure.
If you need any OEM Nissan Frontier Headlight, feel free to choose them out of our huge selection of genuine Nissan Frontier Headlight. All our parts are offered at unbeatable prices and are supported by the manufacturer's warranty. In addition, we offer quick shipping to have your parts delivered to your door step in a matter of days.
Nissan Frontier Headlight Parts Questions & Experts Answers
- Q: What is the importance of aiming the headlights correctly on Nissan Frontier?A:The way you set up your Frotiner and Xterra headlights matters because it stops you from hurting oncoming drivers' eyesight while helping you see better on the road. Your headlights need adjusting at least once a year, or after installing new headlights or fixing collision damage up front. Most models have two adjustment screws, one for moving each headlight side to side and the other to move them up or down. Later models may just have this simpler setup for just moving each lamp up or down. You need a flat, empty space with a blank wall to properly adjust your headlights. Place masking tape to show the center of your vehicle, both headlights, and a clean wall's horizontal line. Make sure the car is 25 feet from the wall, level, with half-full gas tank, and empty of any heavy cargo. For setting low beam headlights, position the bright portion two inches below the straight horizontal line and two inches left of the vertical headlight marking. To work headlights at their best, make sure the bright area focuses directly under the horizontal line. When you need to make a balance choice, pick low beam lights to ensure drivers stay safe. Getting new headlights carefully aligned at the dealership service center right away is the smart thing to do.

Related Nissan Frontier Parts
 Nissan Frontier Headlight Bulb
 Nissan Frontier Fog Light
 Nissan Frontier Bumper
 Nissan Frontier Headlight Switch
 Nissan Frontier Fog Light Bulb
Browse by Year
2025 Headlight 2024 Headlight 2023 Headlight 2022 Headlight 2021 Headlight 2020 Headlight 2019 Headlight 2018 Headlight 2017 Headlight 2016 Headlight 2015 Headlight 2014 Headlight 2013 Headlight 2012 Headlight 2011 Headlight 2010 Headlight 2009 Headlight 2008 Headlight 2007 Headlight 2006 Headlight 2005 Headlight 2004 Headlight 2003 Headlight 2002 Headlight 2001 Headlight 2000 Headlight 1999 Headlight 1998 Headlight