×
- Hello
- Login or Register
- Quick Links
- Live Chat
- Track Order
- Parts Availability
- RMA
- Help Center
- Contact Us
- Shop for
- Nissan Parts
- Nissan Accessories
My Garage
My Account
Cart
Genuine Nissan Versa CV Boot
Axle Boot- Select Vehicle by Model
- Select Vehicle by VIN
Select Vehicle by Model
orMake
Model
Year
Select Vehicle by VIN
For the most accurate results, select vehicle by your VIN (Vehicle Identification Number).
12 CV Boots found


Nissan Versa Repair Kit-Dust Boot,Outer
Part Number: C9241-EL10D$49.34 MSRP: $68.02You Save: $18.68 (28%)Ships in 1-3 Business Days


Nissan Versa Repair Kt Outer RH
Part Number: C9241-EL10A$37.83 MSRP: $52.15You Save: $14.32 (28%)Ships in 1-3 Business Days


Nissan Versa Repair Kit-Dust Boot,Outer
Part Number: C9241-EL00B$41.94 MSRP: $57.82You Save: $15.88 (28%)Ships in 1-3 Business Days


Nissan Versa Inner Dust Boot Repair Kit
Part Number: C9741-EL00A$45.47 MSRP: $62.69You Save: $17.22 (28%)Ships in 1-3 Business Days

Nissan Versa Inner Dust Boot Repair Kit
Part Number: C9741-ED00A$83.04 MSRP: $117.29You Save: $34.25 (30%)Ships in 1-3 Business Days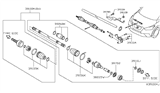
Nissan Versa Repair Dust Boot Kit Inner
Part Number: C9741-ED50A$35.80 MSRP: $49.36You Save: $13.56 (28%)Ships in 1-3 Business DaysNissan Versa Dust Boot Repair Kit Inner
Part Number: C9741-EL10A$34.66 MSRP: $47.78You Save: $13.12 (28%)Ships in 1-3 Business Days
Nissan Versa Repair Dust Boot Kit Outer
Part Number: C9241-3TC2A$38.37 MSRP: $52.90You Save: $14.53 (28%)Ships in 1-3 Business Days
Nissan Versa Repair Dust Boot Kit Inner
Part Number: C9741-3TC2A$124.83 MSRP: $176.32You Save: $51.49 (30%)Ships in 1-3 Business Days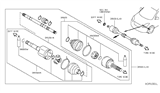
Nissan Versa Repair Dust Boot Kit Inner
Part Number: C9G41-ED00A$71.27 MSRP: $100.67You Save: $29.40 (30%)Ships in 1-3 Business DaysNissan Versa Repair Dust Boot Kit Outer
Part Number: C9B41-EL10A$56.44 MSRP: $77.80You Save: $21.36 (28%)Ships in 1-3 Business Days
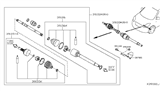
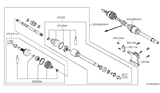
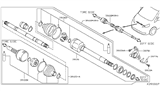
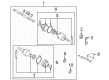
Nissan Versa CV Boot
The Nissan Versa CV Boot is responsible for covering and enclosing the constant velocity joint on each front axle shaft to retain grease and keep out dirt. This CV Boot bends with the angle changes of the axle, permitting seamless power transmission from the transaxle to the wheels even as they rotate with suspension and steering. Maintaining smooth rotation in the Versa drivetrain and limiting wear on precision bearings inside the joint, the CV Boot preserves lubricant while blocking dirt, water, and debris from entering. The CV Boot is made from durable rubber or plastic that is made to expand and contract without cracking so that the joint is enclosed in a selection of driving situations. The greasing escaping and grit entering one torn CV Boot will hasten the deterioration of the joint and produce noise and vibration. All Nissan Versas depend on this shield for drivetrain efficiency. A CV Boot that is sealed properly is essential to the dependable operation of the Nissan front wheel drive layout on the Versa, which is designed to provide the movement Nissan Versa owners expect.
If you need any OEM Nissan Versa CV Boot, feel free to choose them out of our huge selection of genuine Nissan Versa CV Boot. All our parts are offered at unbeatable prices and are supported by the manufacturer's warranty. In addition, we offer quick shipping to have your parts delivered to your door step in a matter of days.
Nissan Versa CV Boot Parts Questions & Experts Answers
- Q: Why are CV Boot crucial for protecting constant velocity (CV) joints on Nissan Versa?A:These boots are vital as they shield the CV joints from common elements such as dirt, water, and other related substances that can harm the component. The boots should be reviewed for splits, breaks, or freed clamps and it is similarly important to look for stains of leaking grease. Any time there are signs of cracks or leakage of the lubricant, then the same will need to be replaced.

