×
- Live Chat
- 1-888-726-6993

My Garage
My Account
My Cart
This part fits the vehicle you selected:
My Vehicle: JN1AZ36A54T015290 2004 Nissan 350Z Convertible (Roadster); 6 Cyl 3.5L; Base; Automatic Transmission
Change VehicleThe vehicle options this part fits:
- Production Date: 07/2003-07/2004
- Fitting Vehicle Options: *AT
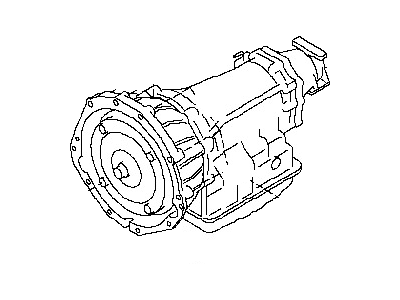
Nissan 31020-92X2B Blank Automatic Transmission
2003-2007 Nissan 350Z 3102092X2B

- Part DescriptionAutomatic Transmission-W/O Programming
- Lookup Code31029N
- ManufacturerNissan
- Manufacturer's NotesThis part is discontinued.
This part fits the vehicle you selected:
JN1AZ36A54T015290 2004 Nissan 350Z Convertible (Roadster); 6 Cyl 3.5L; Base; Automatic Transmission
The vehicle options this part fits:
- Production Date: 07/2003-07/2004
- Fitting Vehicle Options: *AT
$6805.40 MSRP: $7777.60
You Save: $972.20 (13%)
Currently UnavailableDue to manufacturer supply shortage, this item isn’t currently available for ordering.
Product Specifications
| Brand | Genuine Nissan |
| Lookup Code | 31029N |
| Manufacturer Part Number | 31020-92X2B |
| Part Description | Automatic Transmission-W/O Programming |
| Item Dimensions | 36.4 x 37.4 x 25.0 inches |
| Item Weight | 151.50 Pounds |
| Condition | New |
| Fitment Type | Direct Replacement |
| Manufacturer | Nissan |
| SKU | 31020-92X2B |
| Warranty | This genuine Nissan part is guaranteed by Nissan's factory warranty. |
| Shipping & Return | Shipping Policy Return Policy |
Warning: California’s Proposition 65
Customer Questions & Answers
- Q:I want to make sure this part fits my car Posted by NissanPartsDeal Specialist
- A:You can Select Your Vehicle to check if 31020-92X2B fits your vehicle.Posted by NissanPartsDeal Specialist
- Q:What steps must be taken to remove and reinstall the automatic transmission and torque converter assembly on Nissan 350Z? Posted by Customer
- A:The transmission and torque converter must be removed as a single assembly to avoid damage to the converter driveplate, pump bushing, and oil seal, as the driveplate is not designed to support the load. For AWD models, it is recommended to remove the transmission and transfer case as a unit from below the vehicle, which involves dropping the front suspension assembly and separating the transmission from the engine while out of the vehicle. Begin by placing the shift lever in the NEUTRAL position, applying the parking brake, and blocking the rear wheels. Disconnect the cable from the negative terminal of the battery, raise the vehicle securely on jackstands, and drain the transmission fluid before reinstalling the fluid pan's drain plug. Disconnect the transmission fluid cooler lines, and on 350Z models, remove the brace between the shock towers and the front crossbar to facilitate raising the engine/transmission. Disconnect the catalytic converters from the exhaust manifolds and the Y-pipe, then remove them along with any necessary braces. Unplug the main wiring plug on the right side of the transmission, unbolt the clips securing the wiring harness, and disconnect the crankshaft position sensor from the bellhousing. Remove the transmission fluid dipstick and its tube, ensuring to unplug any breather hose if present. Disconnect the shift control rod from the lever on the transmission and remove the driveshaft. Support the transmission with a transmission jack, remove the access cover at the bottom of the bellhousing, and mark the relationship of the torque converter to the driveplate. Remove the starter motor and the metal plate behind it, then remove the driveplate-to-torque converter bolts by rotating the engine until each appears in the opening. Support the engine with a floor jack, raise the transmission slightly to take the weight off the crossmember, and then remove the crossmember. Remove the transmission-to-engine bolts, ensuring to note the length and location of each for reassembly. After confirming all wires are disconnected, move the transmission and jack toward the rear of the vehicle until the torque converter separates from the driveplate, clamping locking pliers to the bellhousing to prevent the torque converter from falling out. Before installation, ensure the torque converter is securely engaged in the pump, applying a small amount of transmission fluid on the rear hub if it was removed. Install the torque converter onto the input shaft while rotating it back and forth to ensure proper engagement. With the transmission secured to the jack, raise it into position, keeping it level to prevent disengagement of the torque converter. Align the torque converter studs with the holes in the driveplate, ensuring the marks on both line up. Move the transmission forward until the dowel pins engage with the holes on the engine, ensuring there is no gap. Install and tighten the transmission-to-engine bolts, ensuring complete mating of the engine and transmission. Attach the shift control rod, install the transmission mount and crossmember, and tighten the bolts/nuts. Install the torque converter bolts and tighten them, then complete the installation in reverse order of removal. Finally, fill the transmission with the specified fluid, run the engine, and check for fluid leaks.Posted by NissanPartsDeal Specialist
- Q:What steps should be taken to diagnose a fault in a automatic transmission before repair work can begin on Nissan 350Z? Posted by Customer
- A:In the event of a fault occurring, it is necessary to establish whether the fault is electrical, mechanical, or hydraulic in nature before any repair work can be contemplated. Diagnosis requires detailed knowledge of the transmission's operation and construction, as well as access to specialized test equipment, making it essential to seek assistance from a dealer service department or other qualified repair facility for assessment. Additionally, a faulty transmission should not be removed until the vehicle has been assessed by a knowledgeable technician equipped with the proper tools, as troubleshooting must be performed with the transmission installed in the vehicle.Posted by NissanPartsDeal Specialist
If you have any questions about this product, please don't hesitate to ask us. We will be happy to help you!
Why choose Nissan Parts Deal
- Dedicated Service
Your complete satisfaction is our #1 goal
- Lowest Prices
Best deals on genuine OE parts from dealerships
- Fast Delivery
Orders are processed and delivered promptly