×
My Garage
My Account
My Cart
This part fits the vehicle you selected:
My Vehicle: 2004 Nissan Pathfinder Wagon; 6 Cyl 3.5L; Federal & California (From 20000120); Four-Wheel Drive (Part Time)
Change VehicleThe vehicle options this part fits:
- Production Date: 07/2002-
- Fitting Vehicle Options: VQ35DE
Nissan 43210-0W000 Bearing-Rear Axle,Inner
1996-2004 Nissan 432100W000
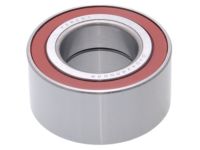


- Part DescriptionBearing-Inner,Rear Axle
- Lookup Code43210
- PositionRear Inner
- Replaces43210-VE000
- ManufacturerNissan
- Require Quantity02
- Package Quantity1
This part fits the vehicle you selected:
2004 Nissan Pathfinder Wagon; 6 Cyl 3.5L; Federal & California (From 20000120); Four-Wheel Drive (Part Time)
The vehicle options this part fits:
- Production Date: 07/2002-
- Fitting Vehicle Options: VQ35DE
$63.37 MSRP: $114.32 1
You Save: $50.95 (45%)
Ships in 1 Business Day
Product Specifications
| Brand | Genuine Nissan |
| Lookup Code | 43210 |
| Manufacturer Part Number | 43210-0W000 |
| Part Description | Bearing-Inner,Rear Axle |
| Item Dimensions | 3.2 x 3.2 x 1.7 inches |
| Item Weight | 1.50 Pounds |
| Position | Rear Inner |
| Condition | New |
| Fitment Type | Direct Replacement |
| Replaces | 43210-VE000 |
| Manufacturer | Nissan |
| SKU | 43210-0W000 |
| Warranty | This genuine Nissan part is guaranteed by Nissan's factory warranty. |
| Shipping & Return | Shipping Policy Return Policy |
Warning: California’s Proposition 65
Customer Questions & Answers
- Q:I would like to verify that part given Posted by NissanPartsDeal Specialist
- A:You can Select Your Vehicle to check if 43210-0W000 fits your vehicle.Posted by NissanPartsDeal Specialist
- Q:How to replace and reinstall the rear axle shafts, Wheel Bearing, Wheel Seal in a Nissan Pathfinder? Posted by Customer
- A:Loosen the wheel lug nuts, raise the rear of the vehicle and support it securely on jackstands. Chock the front wheels to prevent the vehicle from rolling. Remove the wheel, brake drum and brake shoes, disconnect the parking brake cable from the lever on the trailing shoe and unbolt the cable casing from the backing plate, disconnect the hydraulic line fitting from the wheel cylinder, remove the nuts securing the axle retaining plate to the axle housing, connect a slide hammer and adapter to the axle flange and pull the axle from the housing, if the bearing or bearing grease seal must be replaced, take the assembly to an automotive machine shop to have the old bearing and seal removed and new ones installed, pry out the axleshaft oil seal with a seal removal tool and drive in the axleshaft oil seal with a seal installer, wipe the bore in the axle housing clean, apply a thin coat of grease to the outer surface of the bearing, if working on a four-cylinder, 2WD Frontier or Xterra install any shims that were present during removal, guide the axleshaft straight into the axle housing, rotate the shaft slightly to engage the splines on the shaft with the splines in the differential side gear, install new axle retaining plate nuts and tighten them to the torque, check the axleshaft end play using a dial indicator, on four-cylinder, 2WD Frontier and Xterra models the end play should be 0.0008 to 0.0059-inch (0.02 to 0.15 mm) and on all other models the end play should be 0.0-inch (0.0 mm), the remainder of installation is the reverse of removal, check the differential lubricant level and add some, if necessary, bleed the brakes, install the wheel and lug nuts, lower the vehicle and tighten the lug nuts to the torque.Posted by NissanPartsDeal Specialist
If you have any questions about this product, please don't hesitate to ask us. We will be happy to help you!
Why choose Nissan Parts Deal
- Dedicated Service
Your complete satisfaction is our #1 goal
- Lowest Prices
Best deals on genuine OE parts from dealerships
- Fast Delivery
Orders are processed and delivered promptly