×
- Hello
- Login or Register
- Quick Links
- Live Chat
- Track Order
- Parts Availability
- RMA
- Help Center
- Contact Us
- Shop for
- Nissan Parts
- Nissan Accessories
My Garage
My Account
Cart
This part fits
1993 Nissan Pathfinder
Check another vehicle- Production Date: from 08/1989
- Fitting Vehicle Options: *(FED + CAL). (W/2D + W/4D + V/2D), *CAL. W/4D. 4WD. XE, *FED. V/4D + *(FED+ CAL). W/4D. XE, *FED. V/4D + *FED. W/4D. 2WD + *FED. W/4D. 4WD. XE + *CAL. W/4D. 2WD, FED. W/4D. SE + CAL. W/4D. SE
Nissan 24330-C9960 Breaker Circuit
1984-2003 Nissan 24330C9960
Customer Questions & Expert Answers (2)
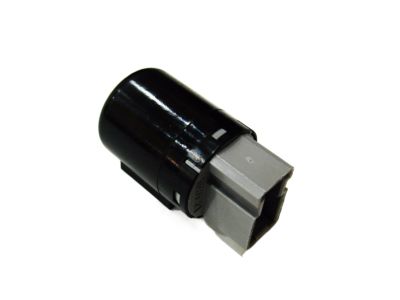
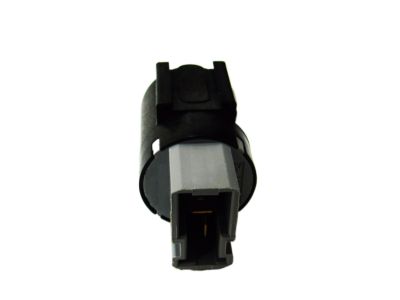
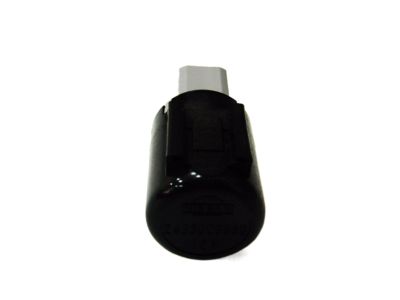
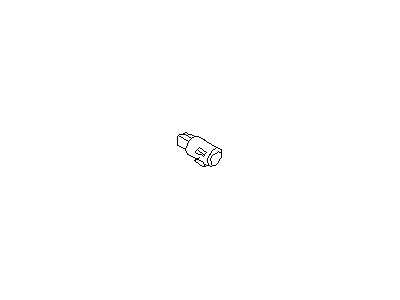
- Part DescriptionCircuit Breaker Assy-Power Window
- F/AUTO DOOR LOCK
- F/AUTO DOOR LOCK F/POWER WINDOW W/O 1 TOUCH
- F/POWER WINDOW
- Lookup Code24330N
- ManufacturerNissan
This part fits
1993 Nissan Pathfinder
Check another vehicle- Production Date: from 08/1989
- Fitting Vehicle Options: *(FED + CAL). (W/2D + W/4D + V/2D), *CAL. W/4D. 4WD. XE, *FED. V/4D + *(FED+ CAL). W/4D. XE, *FED. V/4D + *FED. W/4D. 2WD + *FED. W/4D. 4WD. XE + *CAL. W/4D. 2WD, FED. W/4D. SE + CAL. W/4D. SE
$30.97 MSRP: $46.58
You Save: $15.61 (34%)
1
- Related Parts
- Specifications
- Q&A
Product Specifications
Brand Genuine Nissan Lookup Code 24330N Manufacturer Part Number 24330-C9960 Part Description Circuit Breaker Assy-Power Window Other Names Breaker Assembly, Relay, Resistor, Window Relay Item Dimensions 2.3 x 1.5 x 1.5 inches Item Weight 0.20 Pounds Condition New Fitment Type Direct Replacement Manufacturer Nissan SKU 24330-C9960 Warranty This genuine Nissan part is guaranteed by Nissan's factory warranty. Shipping & Return Shipping Policy Return Policy Warning: California's Proposition 65Customer Questions & Expert Answers
- Q:Does this part fit my vehicle? Posted by NissanPartsDeal Specialist
- A:You can Select Your Vehicle to check if 24330-C9960 fits your vehicle.Posted by NissanPartsDeal Specialist
- Installation and Repair Tips by AI Expert
- Removal steps 1. Park the vehicle on a level surface, turn the ignition off, set the parking brake, and wear eye protection and gloves. 2. Identify the relay using the vehicle's wiring diagram, fuse/relay box cover, or service manual - locations and layouts vary by design. 3. Disconnect the negative battery terminal and tuck the cable away to prevent accidental contact. 4. Remove any access panels or fuse/relay box covers needed to reach the relay; methods of access differ by installation. 5. Photograph or label the relay orientation and connector locations so you can reinstall correctly. 6. Release any retaining clip or tab on the relay or its socket, then pull the relay straight out of the socket; do not yank on wiring. 7. Inspect the relay socket and wiring for corrosion, melting, or loose terminals; clean contacts with an approved electrical contact cleaner and let them dry. 8. If the socket or wiring shows damage, repair or replace the damaged parts before fitting a new relay. Installation steps 1. Confirm the replacement relay matches the original's function, terminal layout, and voltage/current ratings. 2. If cleaning was done, ensure the socket and relay pins are dry and free of debris; apply a very small amount of dielectric grease to the outside of the connector boots only if desired (avoid coating mating contacts). 3. Align the relay pins with the socket and push the relay straight in until it is fully seated and any retaining clip engages. 4. Reinstall any covers or access panels removed earlier and secure them. 5. Reconnect the negative battery terminal and ensure it is snug. 6. Turn the ignition to the appropriate position and operate the circuit controlled by the relay to verify proper function. 7. Check for abnormal smells, smoke, excessive heat, or intermittent operation; if anything unusual occurs, disconnect the battery and re-inspect. 8. Confirm associated fuses are intact and wiring is routed away from heat or moving parts. Repair tip: take photos before removal and keep the old relay until the new one proves to work correctly.
- Q:
Why choose Nissan Parts Deal
- Dedicated Service
Your complete satisfaction is our #1 goal
- Lowest Prices
Best deals on genuine OE parts from dealerships
- Fast Delivery
Orders are processed and delivered promptly