×
- Hello
- Login or Register
- Quick Links
- Live Chat
- Track Order
- Parts Availability
- RMA
- Help Center
- Contact Us
- Shop for
- Nissan Parts
- Nissan Accessories
My Garage
My Account
Cart
This part fits
2007 Nissan Maxima
Check another vehicle- Production Date: from 08/2005
- Fitting Vehicle Options: VQ35DE
Nissan 14010-7Y000 Intake Manifold Collector
2004-2010 Nissan 140107Y000
Customer Questions & Expert Answers (4)
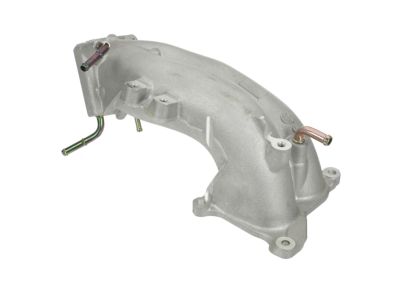
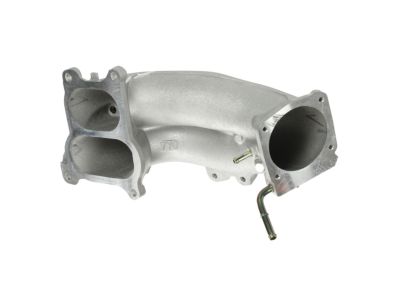

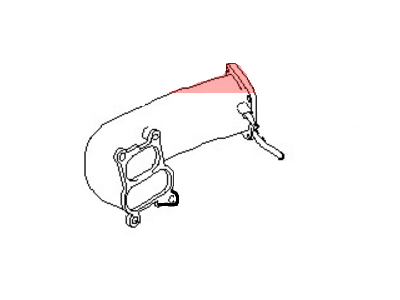
- Part DescriptionCollector-Intake Manifold
- Lookup Code14013MA
- ManufacturerNissan
This part fits
2007 Nissan Maxima
Check another vehicle- Production Date: from 08/2005
- Fitting Vehicle Options: VQ35DE
$139.13 MSRP: $196.52
You Save: $57.39 (30%)
Ships in 1-3 Business Days
1
- Related Parts
- Specifications
- Q&A
Product Specifications
Brand Genuine Nissan Lookup Code 14013MA Manufacturer Part Number 14010-7Y000 Part Description Collector-Intake Manifold Other Names Intake Plenum Item Dimensions 17.9 x 10.2 x 9.5 inches Item Weight 4.70 Pounds Condition New Fitment Type Direct Replacement Manufacturer Nissan SKU 14010-7Y000 Warranty This genuine Nissan part is guaranteed by Nissan's factory warranty. Shipping & Return Shipping Policy Return Policy Warning: California's Proposition 65Customer Questions & Expert Answers
- Q:Will this part fit my car? Posted by NissanPartsDeal Specialist
- A:You can Select Your Vehicle to check if 14010-7Y000 fits your vehicle.Posted by NissanPartsDeal Specialist
Installation and Repair Tips- Q:What are the steps involved in removing and installing the upper and lower intake manifolds on Nissan Maxima? Posted by Customer
- A:To begin the process of removing the upper intake manifold (plenum), disconnect the cable from the negative terminal of the battery and remove the air intake duct. Next, disconnect the accelerator cable, cruise control cable (if equipped), hoses, and electrical connectors from the throttle body, being prepared for some coolant spillage and plugging the hoses immediately to prevent excessive loss. Detach the spark plug wires from the spark plugs and remove them from the retainers on the plenum, then remove the distributor cap and set it aside along with the spark plug wires. Label and disconnect the hoses and electrical connectors attached to the plenum, remove the ground strap, and loosen the upper intake manifold bolts in reverse order of the tightening sequence before removing the upper plenum with the throttle body attached. For installation, clean the mounting surfaces of the intake manifold and upper plenum with lacquer thinner, ensuring all old gasket material or sealant is removed. Install a new gasket over the intake manifold studs, position the upper plenum onto the intake manifold, and tighten the bolts in the proper sequence to the specified torque, completing the installation in reverse order of removal while checking and adding coolant as necessary. For the lower intake manifold, relieve the fuel pressure and disconnect the cable from the negative terminal of the battery, then remove the upper intake manifold. Drain the cooling system, disconnect the electrical connectors from the coolant temperature switch and sensor, and remove the radiator hose from the thermostat housing. Label and detach any vacuum hoses that may interfere with the removal of the lower intake manifold, then remove the fuel rail and injectors. Disconnect the coolant pipes at the transmission end of the intake manifold, loosen the manifold mounting bolts/nuts in 1/4-turn increments until they can be removed by hand in reverse order of the tightening sequence. If the manifold is stuck to the cylinder heads, use caution to avoid damaging the gasket sealing surfaces while breaking the gasket seal. Carefully scrape away all traces of old gasket material and sealant from the manifold and cylinder heads, then clean the mating surfaces. Inspect the coolant pipes below the intake before installing new gaskets and the lower intake manifold, ensuring proper alignment over the dowels in the cylinder heads before installing the nuts. Following the recommended tightening sequence, tighten the nuts/bolts in three equal steps to the specified torque, and complete the installation in reverse order of removal. Refill the cooling system and change the engine oil, then run the engine to check for fuel, vacuum, and coolant leaks.Posted by NissanPartsDeal Specialist
- Q:How to replace the upper intake manifold (plenum) on Nissan Maxima? Posted by Customer
- A:To replace the upper intake manifold (plenum) on 2001 and earlier models, first relieve the fuel pressure, disconnect the negative battery cable, remove the air intake duct, and take out the ignition coils while labeling and disconnecting the hoses and electrical connectors attached to the plenum and throttle body. Next, remove the EGR guide tube and the upper manifold support brackets from the rear of the upper plenum, noting that the bolts are difficult to access. Loosen the upper intake manifold bolts in reverse order of the tightening sequence and remove the upper plenum with the throttle body attached. For installation, clean the mounting surfaces of the intake manifold and upper plenum with lacquer thinner, install a new gasket with the mark facing forward, and tighten the bolts in the recommended sequence. For 2002 and later models, begin by removing the cowl panel and windshield wiper assembly, then the decorative cover from the engine, and the air cleaner housing. Drain the cooling system and disconnect the coolant hoses from the upper intake manifold. Label and disconnect the vacuum hoses and electrical connectors, free the wiring harnesses and hoses from retainers, unscrew the nuts securing the EGR tube to the lower manifold, and unbolt the canister purge and variable air intake solenoids along with the vacuum tank. Remove the upper manifold's support bracket and the five bolts securing the upper manifold to the lower manifold in a criss-cross pattern, lifting the upper manifold off afterward. For the lower intake manifold, detach any remaining hoses that would interfere with its removal, then remove the fuel rail and injectors. Loosen the manifold mounting bolts/nuts in 1/4-turn increments until they can be removed by hand in reverse order of the tightening sequence. If the manifold is stuck to the cylinder heads, use caution to avoid damaging the gasket sealing surfaces. Carefully scrape off old gasket material and sealant, clean the mating surfaces, install new gaskets, position the lower manifold on the engine, and ensure alignment over the studs in the cylinder heads before installing the nuts. Finally, tighten the nuts/bolts following the recommended sequence and check for fuel, vacuum, and coolant leaks after running the engine.Posted by NissanPartsDeal Specialist
- Additional Installation and Repair Tips by AI Expert
- Removal steps 1. Park vehicle on level ground, set parking brake, place engine in park/neutral, and allow engine to cool. 2. Disconnect the negative battery cable. 3. Relieve fuel system pressure if the intake area involves fuel lines (method varies by design). 4. If the intake manifold contains coolant passages, drain or reduce coolant level to below the manifold or isolate hoses as appropriate. 5. Photograph and label vacuum lines, electrical connectors, and hoses to aid reassembly. 6. Remove the air intake duct and airbox to gain access to the manifold. 7. Disconnect electrical connectors and sensors attached to the manifold (locations and types vary by design). 8. Disconnect throttle body linkage or electrical connector and move the throttle body aside if it's mounted to the manifold. 9. Disconnect vacuum hoses, PCV hoses, and any emissions hoses from the manifold. 10. Disconnect fuel rails or fuel lines only after the system is depressurized; cap or plug open lines to prevent contamination. 11. Disconnect coolant hoses that attach to the manifold, catching any remaining coolant. 12. Remove the fasteners securing the manifold, supporting the manifold as the last fasteners are removed to prevent dropping. 13. Lift the manifold straight up and away from the engine, keeping ports covered to prevent dirt entry. 14. Remove old gaskets/seals and clean the mating surfaces without gouging or scratching. Installation steps 1. Verify mating surfaces are clean and dry; fit new intake manifold gaskets or seals (use new gaskets rather than reusing old ones). 2. Position the intake manifold carefully into place, aligning with dowels or ports-do not force it. 3. Install manifold fasteners by hand, then tighten progressively in a balanced pattern; follow the manufacturer's specified sequence and torque values (these vary by design). 4. Reconnect coolant hoses and replace any O-rings or hose clamps as needed. 5. Reconnect fuel lines and rail components, ensuring fittings and seals are properly seated. 6. Reinstall the throttle body and reconnect its linkage or electrical connector. 7. Reattach vacuum, PCV, and emissions hoses to their original locations using your photos/labels. 8. Reconnect sensors and electrical connectors to the manifold and related components. 9. Reinstall the air intake duct and airbox. 10. Refill and bleed the cooling system if coolant was drained; check for proper level. 11. Reconnect the negative battery cable. 12. Start the engine and inspect for vacuum, fuel, and coolant leaks; observe idle quality and listen for abnormal noises. 13. After a short run and cool-down, recheck fluid levels and re-inspect for leaks or loose fittings. Repair tip: Label or tag every hose and connector during removal and take photos - it greatly reduces reassembly errors.
- Q:
Why choose Nissan Parts Deal
- Dedicated Service
Your complete satisfaction is our #1 goal
- Lowest Prices
Best deals on genuine OE parts from dealerships
- Fast Delivery
Orders are processed and delivered promptly