×
- Hello
- Login or Register
- Quick Links
- Live Chat
- Track Order
- Parts Availability
- RMA
- Help Center
- Contact Us
- Shop for
- Nissan Parts
- Nissan Accessories
My Garage
My Account
Cart
Additional information needed to check if this part fits
2008 Nissan Rogue
Check another vehicle- Production Date: 08/2007-08/2009
- Fitting Vehicle Options: *2WD. SL. CVT/MCVT, *4WD. SL. CVT/MCVT, *FED. 4WD. SL. CVT/MCVT
Nissan 21606-1XF0A Cooler Assembly - Auto Transmission Oil
2007-2015 Nissan 216061XF0A
Customer Questions & Expert Answers (2)
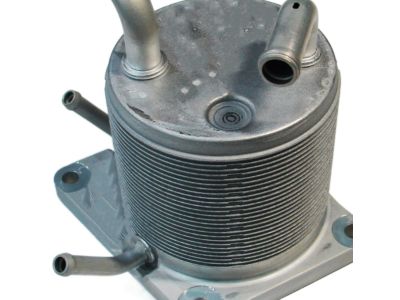
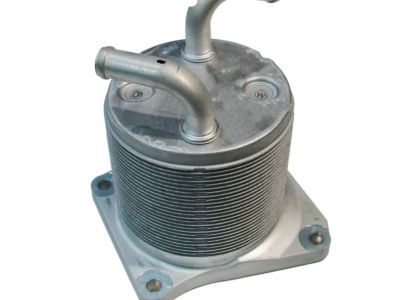
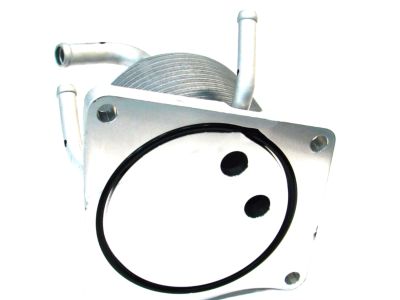
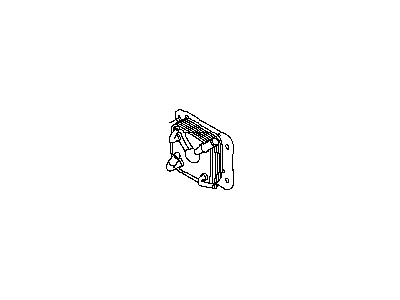
- Part DescriptionOil Cooler Assy-Auto Transmission
- Lookup Code21606X
- ManufacturerNissan
Additional information needed to check if this part fits
2008 Nissan Rogue
Check another vehicle- Production Date: 08/2007-08/2009
- Fitting Vehicle Options: *2WD. SL. CVT/MCVT, *4WD. SL. CVT/MCVT, *FED. 4WD. SL. CVT/MCVT
$368.10 MSRP: $519.92
You Save: $151.82 (30%)
Ships in 1-3 Business Days
1
- Related Parts
- Specifications
- Q&A
Product Specifications
Brand Genuine Nissan Lookup Code 21606X Manufacturer Part Number 21606-1XF0A Part Description Oil Cooler Assy-Auto Transmission Item Dimensions 7.4 x 6.8 x 5.1 inches Item Weight 2.60 Pounds Condition New Fitment Type Direct Replacement Manufacturer Nissan SKU 21606-1XF0A Warranty This genuine Nissan part is guaranteed by Nissan's factory warranty. Shipping & Return Shipping Policy Return Policy Warning: California's Proposition 65Customer Questions & Expert Answers
- Q:Does this part fit my vehicle? Posted by NissanPartsDeal Specialist
- A:You can Select Your Vehicle to check if 21606-1XF0A fits your vehicle.Posted by NissanPartsDeal Specialist
- Installation and Repair Tips by AI Expert
- Removal steps 1. Park on level ground, set parking brake, chock wheels, wear eye protection and gloves, and allow the engine and cooling system to cool. 2. Disconnect the negative battery terminal and isolate the vehicle electrical system. 3. Relieve crankcase and cooling-system pressure safely (remove oil fill cap; only open radiator/expansion cap when cool) before loosening any lines. 4. Drain engine oil into a suitable container; if the oil cooler is coolant-cooled, drain coolant into a separate container. 5. Remove or move any obstructing components that prevent access to the oil cooler (commonly splash shields, ducts, or shrouds) to create working room. 6. Tag/label and disconnect oil feed/return lines and any coolant hoses and electrical connectors (temperature sensors or switches) serving the cooler; cap open lines and catch residual fluid. 7. Remove mounting fasteners and carefully extract the oil cooler assembly without twisting attached lines or damaging mating surfaces. 8. Remove and discard old O-rings/gaskets/seals and thoroughly clean the mounting area and ports; inspect for scoring, corrosion, or debris. 9. Inspect associated hoses, clamps, fittings, and sensor connectors; replace any soft, cracked, or compromised parts before reassembly. Installation steps 1. Fit new O-rings/gaskets/seals onto the cooler, lightly lubricating O-rings with clean engine oil or manufacturer-recommended lubricant to prevent damage during installation. 2. Position the oil cooler assembly in place without forcing, align it properly, and install mounting fasteners; tighten evenly to the vehicle manufacturer's specified procedure and final torque. 3. Reconnect oil lines, coolant hoses, and electrical connectors, confirming correct orientation and secure hose clamp placement. 4. Reinstall any components that were removed to gain access. 5. Refill engine oil to the proper type and level per manufacturer guidance; if coolant was drained, refill the cooling system with the correct coolant and follow the proper bleeding procedure to remove air. 6. Reconnect the negative battery terminal. 7. Start the engine, monitor for oil and coolant leaks at the cooler and connections, verify oil pressure indication returns to normal, and watch engine temperature while allowing the engine to reach operating temperature. 8. After shutdown and cool down, recheck oil and coolant levels and inspect all fittings again; retighten fasteners to spec if required by the service procedure. 9. Properly dispose of drained oil, coolant, and used seals. Repair tip: Always install new sealing parts (O-rings/gaskets) and replace any hoses or clamps that show wear; pressure-test the cooling and oil circuits if contamination or internal failure is suspected.
- Q:
Why choose Nissan Parts Deal
- Dedicated Service
Your complete satisfaction is our #1 goal
- Lowest Prices
Best deals on genuine OE parts from dealerships
- Fast Delivery
Orders are processed and delivered promptly