×
- Hello
- Login or Register
- Quick Links
- Live Chat
- Track Order
- Parts Availability
- RMA
- Help Center
- Contact Us
- Shop for
- Nissan Parts
- Nissan Accessories
My Garage
My Account
Cart
This part fits
2008 Nissan 350Z
Check another vehicle- Production Date: from 11/2007, 11/2006-11/2007
- Fitting Vehicle Options: VQ35HR
Nissan 11060-JK21C Outlet Water
2006-2020 Nissan 11060JK21C
Customer Questions & Expert Answers (2)
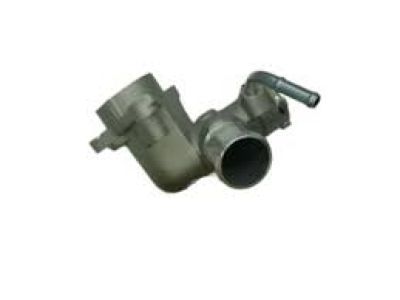
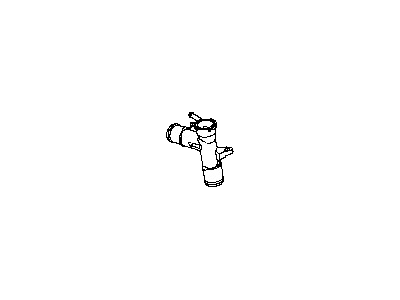
- Part DescriptionOutlet-Water
- Lookup Code11060+A
- Replaces
- ManufacturerNissan
This part fits
2008 Nissan 350Z
Check another vehicle- Production Date: from 11/2007, 11/2006-11/2007
- Fitting Vehicle Options: VQ35HR
$191.48 MSRP: $270.45
You Save: $78.97 (30%)
Ships in 1-3 Business Days
1
- Related Parts
- Specifications
- Q&A
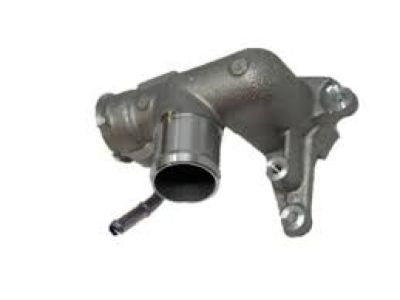
Product Specifications
Brand Genuine Nissan Lookup Code 11060+A Manufacturer Part Number 11060-JK21C Part Description Outlet-Water Other Names Filler Neck, Water Outlet Item Dimensions 6.3 x 4.9 x 4.6 inches Item Weight 0.90 Pounds Condition New Fitment Type Direct Replacement Replaces 11060-JK20B, 11060-JK20C Manufacturer Nissan SKU 11060-JK21C Warranty This genuine Nissan part is guaranteed by Nissan's factory warranty. Shipping & Return Shipping Policy Return Policy Warning: California's Proposition 65Customer Questions & Expert Answers
- Q:Will this part fit my car? Posted by NissanPartsDeal Specialist
- A:You can Select Your Vehicle to check if 11060-JK21C fits your vehicle.Posted by NissanPartsDeal Specialist
- Installation and Repair Tips by AI Expert
- Removal steps 1. Park on level ground, engage parking brake, wear gloves and eye protection, and ensure the engine is cold before starting. 2. Disconnect the negative battery cable to prevent electrical shorts and automatic fan operation. 3. Place a drain pan under the vehicle and drain coolant to a level below the thermostat housing or into a container for proper disposal. 4. Relieve any residual pressure in the cooling system by carefully opening the radiator/coolant reservoir cap only when cold. 5. Remove or move aside any components that obstruct access to the housing (hoses, clamps, intake pieces, brackets, or covers); note that exact items vary by vehicle. 6. Disconnect any electrical connectors attached to the housing or nearby temperature sensors, labeling them if helpful. 7. Loosen hose clamps and detach coolant hoses from the housing, supporting hoses so they are not strained. 8. Unfasten the housing fasteners and remove the housing and thermostat assembly; the number and location of fasteners vary by design. 9. Remove the old gasket or seal and clean mating surfaces thoroughly of old gasket material and debris; inspect the housing for cracks or corrosion. Installation steps 1. Confirm you have the correct replacement housing, gasket/seal, and thermostat (if replacing); follow the part manufacturer's instructions for any sealant or orientation requirements. 2. Install the thermostat in the correct orientation as specified by the part instructions if the thermostat is separate from the housing. 3. Position the new gasket/seal and housing on the cleaned mating surface and start fasteners by hand to ensure proper alignment. 4. Tighten housing fasteners evenly to the manufacturer's specified torque values (consult service information), avoiding over-tightening. 5. Reattach coolant hoses and secure clamps; replace worn clamps if needed and ensure hoses are fully seated. 6. Reconnect any electrical connectors and reposition any components or brackets that were removed. 7. Reconnect the negative battery cable. 8. Refill the cooling system with the correct type and mixture of coolant, then bleed air according to the vehicle or coolant manufacturer's recommended procedure (bleeding procedures vary). 9. Start the engine, allow it to reach operating temperature while monitoring for leaks and checking coolant level, topping up as needed. 10. After a short test drive, recheck for leaks and verify coolant level again; properly dispose of old coolant. Repair tip: Always replace the gasket/seal and consider replacing nearby hose clamps and the thermostat when the housing is serviced to avoid repeating the job.
- Q:
Why choose Nissan Parts Deal
- Dedicated Service
Your complete satisfaction is our #1 goal
- Lowest Prices
Best deals on genuine OE parts from dealerships
- Fast Delivery
Orders are processed and delivered promptly