×
- Hello
- Login or Register
- Quick Links
- Live Chat
- Track Order
- Parts Availability
- RMA
- Help Center
- Contact Us
- Shop for
- Nissan Parts
- Nissan Accessories
My Garage
My Account
Cart
Additional information needed to check if this part fits
2014 Nissan GT-R
Check another vehicle- The location this part fits: Front
- Production Date: 11/2014-04/2016
- Fitting Vehicle Options: VR38DETT
Nissan D1060-80B0A Front Brake Pads Kit
2009-2019 Nissan GT-R D106080B0A
Customer Questions & Expert Answers (2)
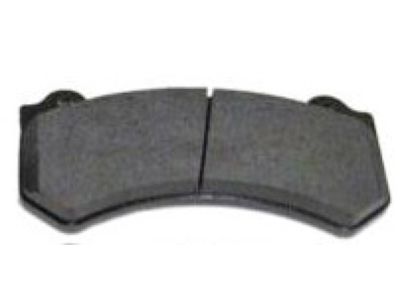
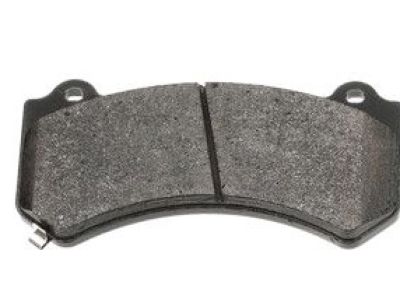
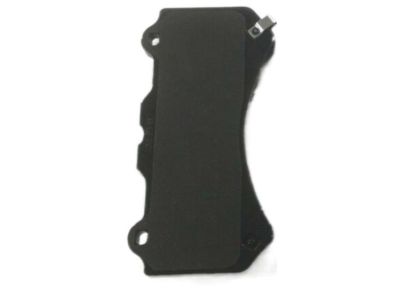
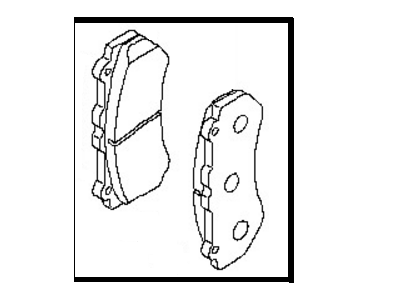
- Part DescriptionPad Kit-Disc Brake,Front
- Lookup Code41000K
- PositionFront
- Replaced By
- Replaces
- ManufacturerNissan
- Manufacturer's NotesThis part is discontinued.
Additional information needed to check if this part fits
2014 Nissan GT-R
Check another vehicle- The location this part fits: Front
- Production Date: 11/2014-04/2016
- Fitting Vehicle Options: VR38DETT
- Related Parts
- Specifications
- Q&A
Product Specifications
Brand Genuine Nissan Lookup Code 41000K Manufacturer Part Number D1060-80B0A Part Description Pad Kit-Disc Brake,Front Other Names Brake Pads, Front Pads Item Dimensions 10.5 x 10.6 x 3.1 inches Item Weight 12.70 Pounds Position Front Condition New Fitment Type Direct Replacement Replaces D1060-JF20D, D1060-JF20C Manufacturer Nissan SKU D1060-80B0A Warranty This genuine Nissan part is guaranteed by Nissan's factory warranty. Shipping & Return Shipping Policy Return Policy Warning: California's Proposition 65Customer Questions & Expert Answers
- Q:I'm trying to find out if this part number or item fits my vehicle. Posted by NissanPartsDeal Specialist
- A:You can Select Your Vehicle to check if D1060-80B0A fits your vehicle.Posted by NissanPartsDeal Specialist
- Installation and Repair Tips by AI Expert
- Removal steps 1. Park on a level surface, chock remaining wheels, place trans in Park (or neutral with wheels blocked), and raise the vehicle only at manufacturer-approved lift/jack points; support with jack stands. 2. Disconnect the negative battery terminal and wait a few minutes for systems to power down. 3. If the vehicle has an electric parking brake or electronic brake actuators, follow the manufacturer's procedure to disable or release them before working on the brakes. 4. Remove the wheel/tire assembly to access the brake caliper and pads. 5. Inspect the caliper area, then loosen and remove caliper fasteners as required; support the caliper so the brake hose is not strained (do not let the caliper hang by the hose). 6. Remove any pad retaining clips, pins, or anti-rattle hardware, noting their orientation for reassembly. 7. Disconnect any pad wear sensor or proximity connectors if equipped and labeled; set aside connectors and hardware. 8. Withdraw the old brake pads from the caliper bracket or carrier and inspect pad backs, shims, and hardware. 9. Clean the caliper bracket contact areas and inspect the piston, guide pins/boots, hoses, and rotor for damage or excess wear. 10. Check brake fluid reservoir level and cover to prevent contamination if piston retraction or brake line work will follow. Installation steps 1. Verify brake fluid level is below the filler neck; if necessary remove a small amount to prevent overflow when retracting the caliper piston. 2. Retract the caliper piston(s) using an appropriate tool or caliper press-do this slowly and evenly; monitor the fluid reservoir while compressing. 3. Install new pad hardware (clips, shims, pins) in the same orientation as removed; replace any worn hardware with new components. 4. Apply a thin layer of high-temperature brake lubricant to pad contact points on the bracket/carrier and to sliding surfaces of guide pins only; avoid contaminating friction surfaces. 5. Fit the new brake pads into the caliper bracket/carrier, reconnect any pad wear sensor connectors if equipped, and verify correct pad orientation. 6. Reinstall and secure the caliper over the pads, ensuring pistons and pads seat properly; tighten caliper fasteners to the manufacturer's torque specification. 7. Reinstall the wheel/tire assembly, lower the vehicle to the ground, and torque the wheel nuts to the proper specification. 8. Reconnect the negative battery terminal and allow vehicle systems to initialize; follow the manufacturer's procedure to re-enable or recalibrate the electric parking brake or brake system if applicable (a scan tool may be required). 9. With the engine off, pump the brake pedal until firm to set pad position; check for fluid leaks and confirm the reservoir is at the correct level, topping with the manufacturer-specified fluid if needed. 10. Perform a cautious low-speed road test to bed the pads and verify braking performance, listening for unusual noises and checking parking brake function. Repair tip: Replace hardware and pads on an axle as a set, avoid contaminating new pad friction surfaces with grease or oil, and consult the vehicle's service manual or a diagnostic tool for any electronic parking brake or sensor recalibration procedures.
- Q:
Why choose Nissan Parts Deal
- Dedicated Service
Your complete satisfaction is our #1 goal
- Lowest Prices
Best deals on genuine OE parts from dealerships
- Fast Delivery
Orders are processed and delivered promptly