×
My Garage
My Account
My Cart
Additional information needed to verify part fitment
My Vehicle: 2002 Nissan Pathfinder Wagon; 6 Cyl 3.5L; Federal & California (From 20000120)
Change VehicleThe vehicle options this part fits:
- Production Date: 10/2000-
- Fitting Vehicle Options: A/4WD. VQ35DE, P/4WD. VQ35DE, P/4WD. VQ35DE. AT + VQ35DE. MT
Nissan 33142-33G10 Seal Oil,Transfer Case
1986-2004 Nissan 3314233G10
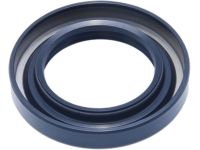


- Part DescriptionSeal-Oil,Transfer Case
- Lookup Code33114
- Replaces33140-33G02
- ManufacturerNissan
2002 Nissan Pathfinder Wagon; 6 Cyl 3.5L; Federal & California (From 20000120)
The vehicle options this part fits:
- Production Date: 10/2000-
- Fitting Vehicle Options: A/4WD. VQ35DE, P/4WD. VQ35DE, P/4WD. VQ35DE. AT + VQ35DE. MT
$11.01 MSRP: $14.92 1
You Save: $3.91 (27%)
Ships in 1-3 Business Days
Product Specifications
| Brand | Genuine Nissan |
| Lookup Code | 33114 |
| Manufacturer Part Number | 33142-33G10 |
| Part Description | Seal-Oil,Transfer Case |
| Other Names | Rear Seal |
| Item Dimensions | 2.7 x 2.8 x 0.4 inches |
| Item Weight | 0.60 Pounds |
| Condition | New |
| Fitment Type | Direct Replacement |
| Replaces | 33140-33G02 |
| Manufacturer | Nissan |
| SKU | 33142-33G10 |
| Warranty | This genuine Nissan part is guaranteed by Nissan's factory warranty. |
| Shipping & Return | Shipping Policy Return Policy |
Warning: California’s Proposition 65
Customer Questions & Answers
- Q:I want to make sure this part fits my car Posted by NissanPartsDeal Specialist
- A:You can Select Your Vehicle to check if 33142-33G10 fits your vehicle.Posted by NissanPartsDeal Specialist
- Q:How do you replace the extension housing oil seal to address oil leaks? Posted by Customer
- A:Oil leaks frequently occur due to wear of the extension housing oil seal, which is located at the extreme rear of the transmission. To replace the seal, raise the vehicle and support it securely on jackstands, then remove the driveshaft. Using a seal removal tool or a large screwdriver, carefully pry the old seal out of the extension housing, then using a seal driver, a large section of pipe or a very large deep socket as a drift, install the new oil seal. Lubricate the splines of the transmission output shaft and the outside of the driveshaft yoke with lightweight grease, then install the driveshaft. Be careful not to damage the lip of the new seal.Posted by NissanPartsDeal Specialist
- Q:How do you perform various tasks related to replacing the output shaft seals and shift shaft oil seal on a transfer case? Posted by Customer
- A:Raise the vehicle and support it securely on jackstands. For the front output shaft seal, a flange holding tool or chain wrench will be required to keep the companion flange from moving while the nut is loosened. Remove the flange nut, withdraw the flange, pry out the old seal and discard it, lubricate the lips of the new seal and the seal case with multi-purpose grease, then tap it evenly into position with a seal installation tool or a large socket, install the companion flange, apply a bead of RTV sealant to the ends of the splines visible in the center of the flange, install the nut and tighten it to the torque, install the driveshaft and check and, if necessary, add the recommended type of lubricant to bring the level up to the bottom of the filler hole. For the rear output shaft seal, pry out the old seal and discard it, lubricate the lips of the new seal and the seal case with multi-purpose grease, then tap it evenly into position with a seal installation tool or a large socket, install the driveshaft and check and, if necessary, add the recommended type of lubricant to bring the level up to the bottom of the filler hole. For the shift shaft oil seal, mark the relationship of the lever to the shift shaft, detach the linkage from the lever, then loosen the pinch bolt and slide the lever off the shaft, carefully pry the seal out of the case, lubricate the new seal with multi-purpose grease, then install it over the shaft and tap it into place with an appropriately sized deep socket, install the lever onto the shaft and tighten the pinch bolt securely, reconnect the linkage to the lever, install the bolt and tighten it securely, and check and, if necessary, add the recommended type of lubricant to bring the level up to the bottom of the filler hole.Posted by NissanPartsDeal Specialist
If you have any questions about this product, please don't hesitate to ask us. We will be happy to help you!
Why choose Nissan Parts Deal
- Dedicated Service
Your complete satisfaction is our #1 goal
- Lowest Prices
Best deals on genuine OE parts from dealerships
- Fast Delivery
Orders are processed and delivered promptly