×
My Garage
My Account
My Cart
Additional information needed to verify part fitment
My Vehicle: 2002 Nissan Pathfinder Wagon; 6 Cyl 3.5L; Federal & California (From 20000120)
Change VehicleThe vehicle options this part fits:
- Production Date: 11/2000-07/2001
- Fitting Vehicle Options: V. MT + W. 2WD. MT
Nissan 32010-4W010 Manual Transmission
2000-2002 Nissan Pathfinder 320104W010
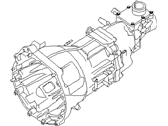

- Part DescriptionTransmission Assy
- Lookup Code32010
- Replaces32010-4W000
- ManufacturerNissan
- Manufacturer's NotesThis part is discontinued.
2002 Nissan Pathfinder Wagon; 6 Cyl 3.5L; Federal & California (From 20000120)
The vehicle options this part fits:
- Production Date: 11/2000-07/2001
- Fitting Vehicle Options: V. MT + W. 2WD. MT
Product Specifications
| Brand | Genuine Nissan |
| Lookup Code | 32010 |
| Manufacturer Part Number | 32010-4W010 |
| Part Description | Transmission Assy |
| Other Names | Transmission |
| Item Dimensions | 40.8 x 21.6 x 21.0 inches |
| Item Weight | 148.40 Pounds |
| Condition | New |
| Fitment Type | Direct Replacement |
| Replaces | 32010-4W000 |
| Manufacturer | Nissan |
| SKU | 32010-4W010 |
| Warranty | This genuine Nissan part is guaranteed by Nissan's factory warranty. |
| Shipping & Return | Shipping Policy Return Policy |
Warning: California’s Proposition 65
Customer Questions & Answers
- Q:I want to make sure this part fits my car Posted by NissanPartsDeal Specialist
- A:You can Select Your Vehicle to check if 32010-4W010 fits your vehicle.Posted by NissanPartsDeal Specialist
- Q:What are the considerations and tools required for overhauling a manual transmission? Posted by Customer
- A:Overhauling a manual transmission is a difficult job for the do-it-yourselfer and should be left to a transmission repair shop as the time and money involved in an overhaul is almost sure to exceed the cost of a rebuilt unit. Nevertheless, it's not impossible for an inexperienced mechanic to rebuild a transmission if the special tools are available and the job is done in a deliberate step-by-step manner so nothing is overlooked. The tools necessary for an overhaul include internal and external snap-ring pliers, a bearing puller, a slide hammer, a set of pin punches, feeler gauges, a dial indicator and possibly a hydraulic press, a large, sturdy workbench and a vise or transmission stand. Before taking the transmission apart for repair, it will help if you have some idea what area of the transmission is malfunctioning and make careful notes of how each piece comes off, where it fits in relation to other pieces and what holds it in place.Posted by NissanPartsDeal Specialist
- Q:How to remove and install a Manual transmission in the Nissan Pathfinder? Posted by Customer
- A:Disconnect the cable from the negative terminal of the battery, remove the Crankshaft Position sensor, shift lever and transfer case shift lever (if applicable), raise the vehicle, remove the skid plate, disconnect the electrical connector from the back-up light switch, neutral position switch and vehicle speed sensor, drain the transmission and transfer case lubricant (if applicable), remove the driveshaft(s), exhaust system components, starter motor, clutch release cylinder, torsion bars (if applicable), support the engine and transmission with a jack, remove the bolts attaching the transmission to the engine and the engine-to-transmission gussets, insert a small amount of multi-purpose grease into the pilot bushing in the crankshaft, lubricate the inner surface of the bushing, apply a light film of grease on the input shaft splines, the area on the front cover where the release bearing rides and the release lever/bearing contact points, install the clutch components (if removed), clean the bell housing-to-engine block mating surfaces, apply a 1/8-inch bead of RTV sealant to the bell housing mating surface, raise the transmission into position behind the engine and then carefully slide it forward, engaging the input shaft with the clutch plate hub, install the transmission-to-engine bolts in their proper locations and tighten them to the torque, raise the transmission into place, install the cross member and attach it to the frame rails, install the transmission mount between the extension housing and the cross member, carefully lower the transmission extension housing onto the mount and the cross member, remove the jacks supporting the transmission and the engine, install the torsion bars (if applicable), install the transfer case and shift linkage (if applicable), install the various items removed previously, plug in the electrical connector for the Vehicle Speed Sensor, the back-up light switch and the Neutral position switch, connect any other wiring attached to the transmission or the transfer case, remove the jackstands and lower the vehicle, install the shift lever(s), fill the transmission with the specified lubricant to the proper level (and transfer case if applicable), connect the cable to the negative terminal of the battery and road test the vehicle for proper operation and check for leakage.Posted by NissanPartsDeal Specialist
- Q:How to properly remove and reinstall the Automatic transmission along with the torque converter as a single assembly? Posted by Customer
- A:The transmission and torque converter must be removed as a single assembly. If you try to leave the torque converter attached to the drive plate, it will cause damage. The drive plate is not designed to bear weight. First, disconnect the cable from the negative terminal of the battery. Raise the vehicle and support it on jack stands, removing the skid plate and skid plate crossmember if equipped. Drain the transmission fluid. On a four-cylinder Frontier model, detach the Throttle Valve cable from the transmission and temporarily reinstall the transmission fluid pan. Detach the shift cable from the manual lever and bracket. Mark the yokes and remove the driveshaft; on 4WD models, remove both driveshafts. Remove obstructive exhaust components, the Crankshaft Position sensor, and the starter motor. Trace the wiring harnesses from the transmission and disconnect them. Remove the inspection cover and mark the relationship of the torque converter to the drive plate. Extract the torque converter-to-drive plate bolts, turning the crankshaft for access. Extract the fill/dipstick tube and its bracket. Detach the fluid cooler lines from the transmission, discarding sealing washers. On 4WD models, remove the transfer case, though if the main aim isn't transmission replacement, one might keep the transfer case attached. Just disconnect the shift rod and the electrical connectors from the speed sensors, and detach the vent tube. Support both the engine and transmission using appropriate jacks. Remove the bolt holding the transmission mount to the cross member. Lower both slightly, then unbolt the transmission from the engine. Slide the transmission back to disengage it from the engine block dowel pins, ensuring the torque converter is detached. Clamp locking pliers on the bell housing to prevent the converter from falling. For installation, confirm the torque converter's engagement in the pump. If you've detached it, lubricate the converter rear hub and install it onto the front input shaft. Raise the transmission into position and align the holes of the torque converter with those in the drive plate. Carefully push the transmission forward, ensuring dowel pins engage with the bell housing. Mate the transmission with the engine without gaps. Install and tighten all bolts while verifying a complete mate between the engine and transmission. Raise the transmission's rear end, reattaching the cross member. Remove supporting jacks. Reconnect the torque converter-to-drive plate bolts and reinstall the dipstick tube. Reattach the starter motor and torque converter inspection cover. With new sealing washers, reconnect the transmission fluid cooler lines and the transmission's electrical connectors. Reconnect the shift cable, and on 4WD models, reinstall the transfer case. Reattach the driveshaft(s) and adjust the shift cable. On four-cylinder Frontier models, reconnect the Throttle Valve cable, install the fluid pan with a fresh gasket, and tighten its bolts. Reattach any removed exhaust components, lower the vehicle, and refill the transmission with the specified fluid. Finally, run the engine and check for any fluid leaks.Posted by NissanPartsDeal Specialist
If you have any questions about this product, please don't hesitate to ask us. We will be happy to help you!
Why choose Nissan Parts Deal
- Dedicated Service
Your complete satisfaction is our #1 goal
- Lowest Prices
Best deals on genuine OE parts from dealerships
- Fast Delivery
Orders are processed and delivered promptly