×
- Hello
- Login or Register
- Quick Links
- Live Chat
- Track Order
- Parts Availability
- RMA
- Help Center
- Contact Us
- Shop for
- Nissan Parts
- Nissan Accessories
My Garage
My Account
Cart
This part fits
1996 Nissan 240SX
Check another vehicle- Production Date: 07/1996-09/1997
- Fitting Vehicle Options: KA24DE
Nissan 14930-3M200 Valve Control-PURGE
1996-1999 Nissan 149303M200
Customer Questions & Expert Answers (2)
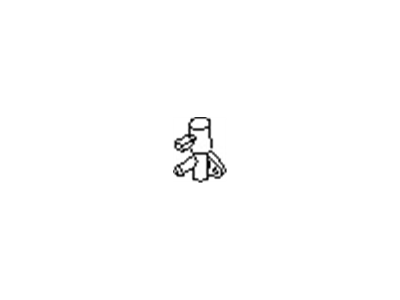
- Part DescriptionValve Assy-Control
- Lookup Code14920
- Replaced By
- ManufacturerNissan
This part fits
1996 Nissan 240SX
Check another vehicle- Production Date: 07/1996-09/1997
- Fitting Vehicle Options: KA24DE
$116.32 MSRP: $164.30
You Save: $47.98 (30%)
Currently UnavailableDue to manufacturer supply shortage, this item isn't currently available for ordering.
- Related Parts
- Specifications
- Q&A
Product Specifications
Brand Genuine Nissan Lookup Code 14920 Manufacturer Part Number 14930-3M200 Part Description Valve Assy-Control Manufacturer Note F009T17091 Item Dimensions 3.3 x 4.5 x 8.4 inches Item Weight 0.80 Pounds Condition New Fitment Type Direct Replacement Manufacturer Nissan SKU 14930-3M200 Warranty This genuine Nissan part is guaranteed by Nissan's factory warranty. Shipping & Return Shipping Policy Return Policy Warning: California's Proposition 65Customer Questions & Expert Answers
- Q:Will this part fit my car? Posted by NissanPartsDeal Specialist
- A:You can Select Your Vehicle to check if 14930-3M200 fits your vehicle.Posted by NissanPartsDeal Specialist
- Installation and Repair Tips by AI Expert
- Removal steps 1. Park on level ground, engage parking brake, wear eye/hand protection and work in a well-ventilated area. 2. Allow the engine to cool if it has been running. 3. Disconnect the negative battery terminal and keep it isolated. 4. Locate the purge valve - its location varies by design; consult factory/manual or visually trace EVAP/vacuum lines as needed. 5. Photograph or label each vacuum hose and electrical connector to ensure correct reassembly. 6. Disconnect the electrical connector by releasing the locking tab; avoid pulling on wires. 7. Remove vacuum/hose connections, loosening clamps or clips as required; plug or cap open lines to keep dirt out. 8. Remove any mounting fasteners or brackets securing the valve and support the valve as you free it. 9. Extract the valve and inspect mating hoses, clamps, and O-rings; replace any brittle or damaged components. Installation steps 1. Compare the new valve to the old one; transfer or replace O-rings and mounting hardware if applicable. 2. Position the valve and secure it with its mounting fasteners or bracket; snug fittings by hand then tighten appropriately (do not invent torque values). 3. Reconnect vacuum hoses to their original ports using the labels/photos as a guide and install new clamps if hoses are worn. 4. Reattach the electrical connector until it seats and locks; use a small amount of dielectric grease on terminals if desired. 5. Reconnect the negative battery terminal. 6. Start the engine and observe for proper operation - listen for the valve click (if applicable) and check for vacuum or fuel odor leaks. 7. Clear or scan for EVAP-related trouble codes if available, then perform a short drive cycle to confirm no return of codes. 8. Recheck fittings and wiring for security after the initial test run. Repair tips 1. Take clear photos before removal to avoid routing/hose mistakes. 2. Replace cracked hoses and worn clamps during installation to prevent future leaks.
- Q:
Why choose Nissan Parts Deal
- Dedicated Service
Your complete satisfaction is our #1 goal
- Lowest Prices
Best deals on genuine OE parts from dealerships
- Fast Delivery
Orders are processed and delivered promptly