×
- Hello
- Login or Register
- Quick Links
- Live Chat
- Track Order
- Parts Availability
- RMA
- Help Center
- Contact Us
- Shop for
- Nissan Parts
- Nissan Accessories

My Garage
My Account
Cart
Genuine 2001 Nissan Quest Cylinder Head
Head- Select Vehicle by Model
- Select Vehicle by VIN
Select Vehicle by Model
orMake
Model
Year
Select Vehicle by VIN
For the most accurate results, select vehicle by your VIN (Vehicle Identification Number).
2 Cylinder Heads found
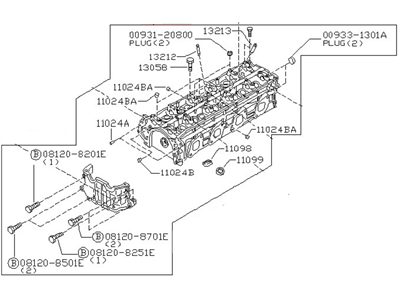
 Product Specifications
- Other Name: Head Assy-Cylinder; Cylinder Head
- Replaces: 11040-0W000
- Lookup Code: 11041
- Item Weight: 18.80 Pounds
- Item Dimensions: 21.2 x 8.8 x 5.2 inches
- Condition: New
- Fitment Type: Direct Replacement
- SKU: 11040-1W200
- Warranty: This genuine part is guaranteed by Nissan's factory warranty.
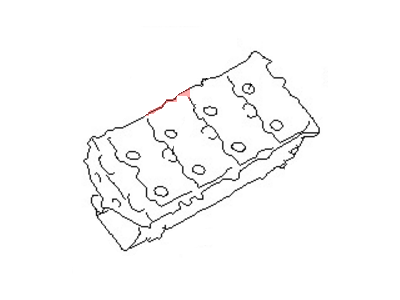 Product Specifications
- Other Name: Head Assy-Cylinder,LH; Cylinder Head
- Position: Driver side
- Replaces: 11090-0W000
- Lookup Code: 11041M
- Item Weight: 10.20 Pounds
- Item Dimensions: 18.5 x 8.9 x 7.2 inches
- Condition: New
- Fitment Type: Direct Replacement
- SKU: 11090-1W200
- Warranty: This genuine part is guaranteed by Nissan's factory warranty.
2001 Nissan Quest Cylinder Head
Committed to delivering top-notch quality at affordable prices, our website is your go-to source for OEM 2001 Nissan Quest Cylinder Head worldwide. Each of our genuine 2001 Nissan Quest Cylinder Head come with a manufacturer's warranty, so rest assured, quality and cost are covered. With us, you're making a smart choice that stands the test of time.
2001 Nissan Quest Cylinder Head Parts Questions & Experts Answers
- Q:What steps should be followed to properly replace the cylinder head on an engine on 2001 Nissan Quest?Posted by Jena R.A:This should be done after the engine has been switched off and allowed to cool to the normal room temperature. The cylinder head bolts cannot be used for the second time, so, make a purchase of new bolts before proceeding with their fitting. Start with the coolant removal, the timing belt and/ or chain, the camshaft sprocket(s), and the rear timing cover; additionally, the bolts which secure the coolant pipes to the back of the cylinder head at the camshaft end plates. Next, the intake manifold should be unbolted and the fuel injectors and their connectors as well as the rocker arms and lifters will have to be relocated. Pull off the exhaust manifold(s) and place labels on the hoses and connectors of the fuel rail and electrical harness at the timing belt side of the engine block. On the front cylinder head, there are spark plug wires, distributor and coil to be disconnected while the air conditioning compressor together with its bracket has to be unbolted but the refrigerant hoses are left connected, and the compressor is held away from the vehicle to offload strain on the hoses. The compressor and alternator bracket have to be removed, the next step is to remove the bracket supporting the engine oil dipstick tube to the cylinder head, and the last bolts before opening the valley between the heads are the coolant pipe ones. To access the rear cylinder head, remove the heater hoses and brackets coming from the transaxle end. To relieve tension, turn the cylinder head bolts in a left-hand direction with the hex drive tool to 1/4-turn before the bolts can be fully undone by hand, and the direction must be in numerical sequence. Take off the washers from the cylinder head bolts and the bolts-new cylinder head bolts for the assembly while it should be noted that the cylinder head bolt washers can be reused. Remove the cylinder head off the engine block by gently applying force; if more force is required use a wood block and start banging gently but ensure that the cylinder head or engine block is not damaged. Take off the old cylinder head gaskets and clean the mating surfaces of the engine block and the cylinder head for any dirt and debris to ensure they are clean for the forming of a good seal. Scrape off carbon and the old gasket material you have to use a gasket scraper, and then use some lacquer thinner or acetone to wash the surfaces to the best of your abilities while noting any troublespots that you might need to file or machine. For this purpose, chase the threads in the cylinder head bolt holes with a tap of the appropriate size while those of the engine block should be cleaned and well dried. Align the new gaskets to the dowel pins in relation to the intake and exhaust ports on the engine block; use caution not to damage the gasket when installing the heads onto the block; and apply oil to new cylinder head bolts and install in the recommended locations. Screw them till they are tight to the last turn but make sure the washers are in the right place. It is advised to proceed with the following sequence to tighten the bolts and reach the specified torque value, though it is longer bolts to be of attention. Proceed to screw in the small bolt on the outside of the cylinder head with the torque of 80 to 104 in-lbs and carryout the rest installation procedure in solution in an opposite manner to that aforementioned. Last but not the least, pour the coolant; this is followed by replacing the engine oil and its filter and then bringing the engine into life and look for signs such as oil droplets and coolant spotted around.Answered by Nissan Parts Specialist Jim / Mar 08, 2026
Related 2001 Nissan Quest Parts
 2001 Nissan Quest Cylinder Head Bolts
 2001 Nissan Quest Timing Cover
 2001 Nissan Quest Camshaft
 2001 Nissan Quest Cylinder Head Gasket
 2001 Nissan Quest Rocker Arm
 2001 Nissan Quest Intake Valve
 2001 Nissan Quest Exhaust Valve