My Garage
Cart
Make sure this part fits

Nissan 11040-JA00A Cylinder Head Assembly

2007-2015 Nissan 11040JA00A

Customer Questions & Expert Answers (5)
11040-JA00A Nissan Cylinder Head Assembly Illustration 1 of 1
  • Part Description
    Head Assy-Cylinder. This item is non-returnable.
  • Lookup Code
    11041
  • Manufacturer
    Nissan
Make sure this part fits
$1275.73 MSRP: $1617.03
You Save: $341.30 (22%)
Ships in 1-2 Business Days
1
ADD TO CART
  • Related Parts
  • Product Specifications
  • Vehicle Fitment
  • Customer Questions & Expert Answers
  • Product Specifications

    BrandGenuine Nissan
    Lookup Code11041
    Manufacturer Part Number11040-JA00A
    Part DescriptionHead Assy-Cylinder. This item is non-returnable.
    Other NamesCylinder Head
    Item Dimensions27.6 x 24.2 x 24.2 inches
    Item Weight47.30 Pounds
    ConditionNew
    Fitment TypeDirect Replacement
    ManufacturerNissan
    SKU11040-JA00A
    Shipping & ReturnShipping Policy Return Policy
    Warning: California's Proposition 65
  • Vehicle Fitment

    Year Make Model Trim & Engine Important vehicle option details
    2007-2013 Nissan AltimaBase, Hybrid, S|4 Cyl 2.5LQR25DE
    2008-2015 Nissan RogueS, SL, SV|4 Cyl 2.5LQR25DE
    2007-2012 Nissan SentraSE-R, Spec V|4 Cyl 2.5LQR25DE
  • Customer Questions & Expert Answers

    Q:
    Will this part fit my car? Posted by NissanPartsDeal Specialist
    A:
    You can Select Your Vehicle to check if 11040-JA00A fits your vehicle.
    Posted by NissanPartsDeal Specialist
    Q:
    How to remove and install a cylinder head on 4 cylinder Nissan Altima? Posted by Customer
    A:
    Before removing of the cylinder head first take off the pressure from the fuel system make the engine ready for TDC compression in cylinder no. 1 and match off the connection wire from negative terminal of battery. Remove the coolant, detract the timing chain, cam shaft, exhaust manifold and intake manifold. Unlike the specific items that were added on the next step, information related to the cylinder head should state that all the G-Particles which are related to coolant fitting, tubes, cables, hoses or wiring harnesses should be labeled and detached. The cylinder head bolt or screw fastener should be loosened by 1/4 turn each time and finally removed by the hand, if you are using a breaker bar and the hex bit and uniformly applying its torque then the desired result can be obtained without warping or cracking of the cylinder head utilising the reverse order of the sequence in which the bolts were tightened. In this process, raise the cylinder head off the engine block, especially if it is lodged in place and then, remove all the external structures for thorough washing and examining. Regarding installation, the mating surfaces for the cylinder head and block should be absolutely pure, using a gasket scraper and cleaning agents to clear off carbon and old gasket substances. Clean the components' mating surfaces; use a fine file for minor splines and consider machining for major splines. Thread the threads that are in the cylinder head bolt holes with the use of a tap and vacuum clean the same. Following this, make sure that the gasket surface of the cylinder head is clean and that the head is not warped and replace any part that you may have been compelled to uninstall. Place the new cylinder head gasket over the dowel pins at the block and then fit the cylinder head carefully over the block with no effecting the position of the gasket. It is recommended to drip a little of clean engine oil over the threaded and hardened washers of the new cylinder head bolts, while the chamfered side of the washers should face the bolt heads. Replacing the cylinder head bolts with new ones, and tighten these bolts with proper sequence and to the prescribed torque. Insatll the lifters and the camshafts follow by the timing chain, and then finally check the valve clearances. The remaining installation steps are the exact opposite of the removal process of the corresponding program. The cooling system should be refilled, a new oil filter should be put in, and oil should be added to the engine and battery reconnected as needed along with any re learn steps that may need to be carried out.
    Posted by NissanPartsDeal Specialist
    Q:
    What steps are involved in removing and reinstalling the upper oil pan and cylinder head in V6 engine on Nissan Altima? Posted by Customer
    A:
    This procedure involves dealing with the upper oil pan and is only possible if the engine is extracted from the car for the automatic transmission cars as the manual ones also need the engine pulling out. Initially, pull the engine and disconnect it from the transmission then remove timing chains and the sprockets, in such a way that crankshaft is positioned on TDC of compression stroke on No 1 cylinder. After that, remove camshafts, lower intake manifold, and coolant outlet and; remove the rear timing chain cover bolts in the opposite sequence that was used when tightening them. Remove the rear timing cover by loosening it with a block of wood and hammer and do not use pry bar on the cover/cylinder head interface. O-rings have to be returned from the cylinder heads and engine block and the IVT valves should be also returned. Removal of the remaining labels and any other parts connected to the cylinder head, and the loosening of the cylinder head bolts for 1/4-turn and finally removing the cylinder head by hand from the bottom upwards in a reverse order to minimize warping. Remove the cylinder head of the engine block by lifting it and if it is rigid, apply some force to loosen it and pull it off, also, take out all the exterior fixtures of the engine for cleaning and checking. Make sure that the mating surfaces of the cylinder head and block contain no traces of the old gasket material before the installation; for this, a gasket scraper and the brake cleaner may be useful. On the cylinders, clean with rags and ensure that there are no debris that could hinder the functioning of the cylinders and also check for any kind of damage on the mating surfaces and if there is, get a competent person to repair it. Sweep the threads in the head bolt holes and blow out the debries that might be still remaining with the compressed air. Ensure that cylinder head is not warped by placing a straight edge on it, also check on the head gasket and the manifold to see that they are in good condition. Replace the screws/bolts that were removed from the head, align the new cylinder head gasket over dowel pins and then locate the head on the block properly. Pour some clean engine oil on the threads and washer of the new cylinder head bolts then, tighten them in the correct sequence with the required torque. Remove the old gasket and apply clean rags to dry the and clean the cleaning the rear timing chain cover and bolts the seating surfaces of the cover and the block apply the RTV sealant to these surfaces slip the O-rings into place and put the rear timing chain cover and tighten the bolts down to the prescribed torque specification. Replace the camshafts and timing chains and do the reverse procedure of the removal steps above. Lastly, raise the engine back into the car, add coolant to the cooling system and oil to the engine and fit a new oil filter, and connect the battery then do re-learns where necessary and start the car, check for oil leakages and also for the coolant leakage if any.
    Posted by NissanPartsDeal Specialist
    Q:
    How to remove and install a cylinder head in an engine on Nissan Sentra? Posted by Customer
    A:
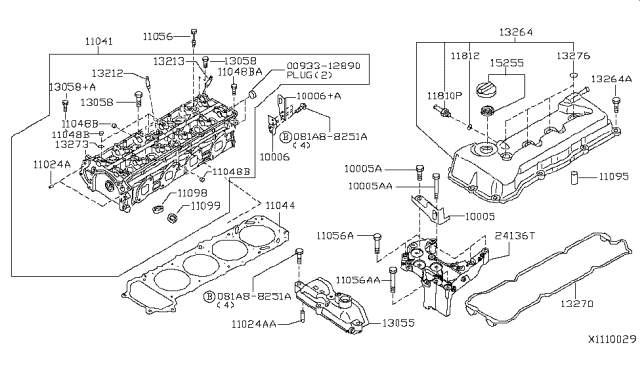
    Disconnect the multiselector/fuel rail pressure signal adaptor quick-connect and remove the snap ring, then have the engine at TDC compression for cylinder no. 1. Remove the cooling system fluid and take out the timing chain; the camshafts and the exhaust and intake manifolds. Anyone remaining items connected to the cylinder head should be removed and labeled appropriately-coolant fittings/tubes, cables, hoses, or wiring harnesses inclusive. Attach a breaker bar to the appropriate-size hex bit in cylinder head bolts and turn them counterclockwisely in 1/4 turn until they can be removed by hand; apply the reverse of the above process to avoid warping or cracking of cylinder head. Raise up the cylinder head off of the engine block with, perhaps, some force if it is tightly fixed in place. Take out all the bolts from the C/cylinder head so that it is externally clean and dismantled for inspection. The surfaces of the cylinder head and the block which are required to mate have to be free from dirt before they are placed together. Gasket scraper has to be used to scrape off the carbon and the old the gasket material while the surfaces to be mated have to be wiped with the lacquer thinner or acetone, making sure there is no oil that may hinder proper sealing of the gasket. Pack the cylinders with clean shop rags to reduce the chance of bringing in new material so use a vacuum cleaner to clean all the cylinders. Inspect all the flat surfaces of the block and the cylinder head for any signs of nicks, scratch marks or the like or use a fine file if there is mild or use the machining service if there is severe damage. You should change the tap to one that will chase the threads in the cylinder head bolt holes, and blow off the holes with compressed air. When the gasket surface of the cylinder head is cleaned, ensure that it is warping and look at the cylinder head gasket, intake, and exhaust manifold. Bolt any components that were removed from the Cylinder head; align any new cylinder head gasket over the dowel pin in the block; and gently lay the Cylinder head on the block over the gasket. Before tightening a new cylinder head, bolts must be lubricated with a clean engine oil where the threads and the hardened washers are passed through the chamfered side of the washers facing the head of the bolts. Replace the new cylinder head bolts and correctly tighten them in the advised sequence to the right torque. The lifters have to be put into position together with the camshafts, and the timing chain has to go on next the valve clearances have to be checked. The rest of the installation procedure is, of course, the exact opposite to the removal process. Replace the coolant that has lost opacity, replace the oil filter, and put some oil in the engine. Finally, connect the battery , and those of you who are interested in some of the re-learn procedures, turn the Ignition switch on.
    Posted by NissanPartsDeal Specialist
    Q:
    How can warpage of the cylinder head be checked for the 2008 Nissan Rogue? Posted by Customer
    A:
    The cylinder head should be checked for warpage.
    Posted by NissanPartsDeal Specialist
    See expert answers on similar Cylinder Head
    If you have any questions about this product, please don't hesitate to ask us. We will be happy to help you!

Genuine Nissan Part 11040-JA00A, the Right Choice

To ensure reliability, purchase Nissan part # 11040-JA00A Cylinder Head Assembly. It can be referred to as Cylinder Head. The first option would be to use OEM parts. Designed by Nissan manufacturer and are produced with stringent factory specifications, undergoing the quality control procedures. This part fits 2007-2013 Altima, 2008-2015 Rogue, 2007-2012 Sentra.

NissanPartsDeal.com is a leading supplier of genuine Nissan parts and accessories, such as 11040JA00A Cylinder Head Assembly. Welcome to our vast selection of competitively priced genuine Nissan parts available online. We provide each OEM part with a manufacturer's warranty and a straightforward return policy. Place your order now and receive your parts quickly, shipped directly to your doorstep.

Why choose Nissan Parts Deal

  • Dedicated Service

    Your complete satisfaction is our #1 goal

  • Lowest Prices

    Best deals on genuine OE parts from dealerships

  • Fast Delivery

    Orders are processed and delivered promptly