×
- Hello
- Login or Register
- Quick Links
- Live Chat
- Track Order
- Parts Availability
- RMA
- Help Center
- Contact Us
- Shop for
- Nissan Parts
- Nissan Accessories

My Garage
My Account
Cart
Genuine 2001 Nissan Quest Piston
Engine Pistons- Select Vehicle by Model
- Select Vehicle by VIN
Select Vehicle by Model
orMake
Model
Year
Select Vehicle by VIN
For the most accurate results, select vehicle by your VIN (Vehicle Identification Number).
21 Pistons found
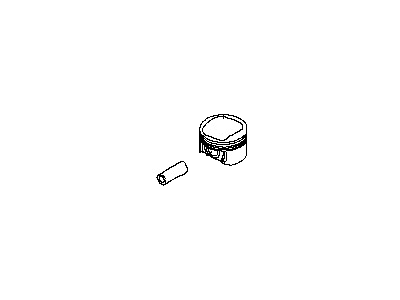
 Product Specifications
- Other Name: Piston-W/Pin
- Replaced by: A2010-2Z077
- Lookup Code: 12010
- Item Weight: 1.20 Pounds
- Item Dimensions: 3.9 x 3.6 x 3.3 inches
- Condition: New
- Fitment Type: Direct Replacement
- SKU: A2010-7B077
- Warranty: This genuine part is guaranteed by Nissan's factory warranty.
- Product Specifications
- Other Name: Piston-W/Pin
- Manufacturer Note: OS=0.25
- Replaced by: A2010-2Z076
- Lookup Code: 12010
- Item Weight: 1.20 Pounds
- Item Dimensions: 4.0 x 3.6 x 3.2 inches
- Condition: New
- Fitment Type: Direct Replacement
- Require Quantity: 2
- SKU: A2010-7B076
- Warranty: This genuine part is guaranteed by Nissan's factory warranty.
- Product Specifications
- Other Name: Piston-W/Pin
- Manufacturer Note: STD GRADE 6
- Replaced by: A2010-2Z066
- Lookup Code: 12010
- Item Weight: 1.30 Pounds
- Item Dimensions: 3.9 x 3.9 x 3.1 inches
- Condition: New
- Fitment Type: Direct Replacement
- SKU: A2010-7B066
- Warranty: This genuine part is guaranteed by Nissan's factory warranty.
- Product Specifications
- Other Name: Piston-W/Pin
- Manufacturer Note: STD GRADE 5
- Replaced by: A2010-5S665
- Lookup Code: 12010
- Item Weight: 1.30 Pounds
- Item Dimensions: 3.9 x 3.6 x 3.5 inches
- Condition: New
- Fitment Type: Direct Replacement
- SKU: A2010-7B065
- Warranty: This genuine part is guaranteed by Nissan's factory warranty.
- Product Specifications
- Other Name: Piston-W/Pin
- Manufacturer Note: STD GRADE 4
- Replaced by: A2010-5S664
- Lookup Code: 12010
- Item Weight: 1.20 Pounds
- Item Dimensions: 3.9 x 3.7 x 3.4 inches
- Condition: New
- Fitment Type: Direct Replacement
- SKU: A2010-7B064
- Warranty: This genuine part is guaranteed by Nissan's factory warranty.
- Product Specifications
- Other Name: Piston-W/Pin
- Manufacturer Note: STD GRADE 3
- Replaced by: A2010-2Z063
- Lookup Code: 12010
- Item Weight: 1.30 Pounds
- Item Dimensions: 3.9 x 3.9 x 3.1 inches
- Condition: New
- Fitment Type: Direct Replacement
- Require Quantity: 2
- SKU: A2010-7B063
- Warranty: This genuine part is guaranteed by Nissan's factory warranty.
- Product Specifications
- Other Name: Piston-W/Pin
- Manufacturer Note: STD GRADE 2
- Replaced by: A2010-5S662
- Lookup Code: 12010
- Item Weight: 1.20 Pounds
- Item Dimensions: 3.9 x 3.8 x 3.3 inches
- Condition: New
- Fitment Type: Direct Replacement
- SKU: A2010-7B062
- Warranty: This genuine part is guaranteed by Nissan's factory warranty.
- Product Specifications
- Other Name: Piston-W/Pin
- Manufacturer Note: STD GRADE 1
- Replaced by: A2010-5S662
- Lookup Code: 12010
- Item Weight: 1.20 Pounds
- Item Dimensions: 3.9 x 3.7 x 3.3 inches
- Condition: New
- Fitment Type: Direct Replacement
- SKU: A2010-7B061
- Warranty: This genuine part is guaranteed by Nissan's factory warranty.
 Product Specifications
- Other Name: Piston-W/Pin
- Replaces: 12010-2Z077, 12010-7B077, A2010-7B077
- Lookup Code: 12010
- Item Weight: 1.20 Pounds
- Item Dimensions: 3.9 x 3.7 x 3.2 inches
- Condition: New
- Fitment Type: Direct Replacement
- Require Quantity: 3
- SKU: A2010-2Z077
- Warranty: This genuine part is guaranteed by Nissan's factory warranty.
- Product Specifications
- Other Name: Piston-W/Pin
- Replaces: 12010-2Z076, A2010-7B076, 12010-7B076
- Lookup Code: 12010
- Item Weight: 1.20 Pounds
- Item Dimensions: 4.0 x 3.8 x 3.2 inches
- Condition: New
- Fitment Type: Direct Replacement
- Require Quantity: 3
- SKU: A2010-2Z076
- Warranty: This genuine part is guaranteed by Nissan's factory warranty.
- Product Specifications
- Other Name: Piston-W/Pin
- Replaces: 12010-2Z072, 12010-7B072, A2010-7B072
- Lookup Code: 12010
- Item Weight: 1.20 Pounds
- Item Dimensions: 3.9 x 3.6 x 3.1 inches
- Condition: New
- Fitment Type: Direct Replacement
- Require Quantity: 3
- SKU: A2010-2Z072
- Warranty: This genuine part is guaranteed by Nissan's factory warranty.
- Product Specifications
- Other Name: Piston-W/Pin; Piston
- Replaces: 12010-2Z071, 12010-7B071, A2010-7B071
- Lookup Code: 12010
- Item Weight: 1.20 Pounds
- Item Dimensions: 3.9 x 3.8 x 3.3 inches
- Condition: New
- Fitment Type: Direct Replacement
- Require Quantity: 3
- SKU: A2010-2Z071
- Warranty: This genuine part is guaranteed by Nissan's factory warranty.
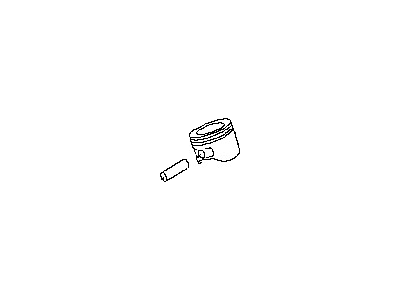 Product Specifications
- Other Name: Piston-W/Pin; Piston
- Replaces: 12010-7B066, 12010-2Z066, A2010-7B066
- Lookup Code: 12010
- Item Weight: 1.30 Pounds
- Item Dimensions: 4.0 x 4.0 x 3.1 inches
- Condition: New
- Fitment Type: Direct Replacement
- Require Quantity: 3
- SKU: A2010-2Z066
- Warranty: This genuine part is guaranteed by Nissan's factory warranty.
- Product Specifications
- Other Name: Piston-W/Pin
- Replaced by: A2010-5S665
- Lookup Code: 12010
- Item Weight: 1.30 Pounds
- Item Dimensions: 3.9 x 3.7 x 3.6 inches
- Condition: New
- Fitment Type: Direct Replacement
- Require Quantity: 3
- SKU: A2010-2Z065
- Warranty: This genuine part is guaranteed by Nissan's factory warranty.
- Product Specifications
- Other Name: Piston-W/Pin
- Replaced by: A2010-5S664
- Lookup Code: 12010
- Item Weight: 1.20 Pounds
- Item Dimensions: 3.9 x 3.6 x 3.3 inches
- Condition: New
- Fitment Type: Direct Replacement
- Require Quantity: 3
- SKU: A2010-2Z064
- Warranty: This genuine part is guaranteed by Nissan's factory warranty.
- Product Specifications
- Other Name: Piston-W/Pin; Piston
- Replaces: 12010-7B063, 12010-2Z063, A2010-7B063
- Lookup Code: 12010
- Item Weight: 1.30 Pounds
- Item Dimensions: 3.9 x 3.9 x 3.0 inches
- Condition: New
- Fitment Type: Direct Replacement
- Require Quantity: 3
- SKU: A2010-2Z063
- Warranty: This genuine part is guaranteed by Nissan's factory warranty.
- Product Specifications
- Other Name: Piston-W/Pin
- Replaced by: A2010-5S662
- Lookup Code: 12010
- Item Weight: 1.20 Pounds
- Item Dimensions: 3.8 x 3.7 x 3.4 inches
- Condition: New
- Fitment Type: Direct Replacement
- Require Quantity: 3
- SKU: A2010-2Z062
- Warranty: This genuine part is guaranteed by Nissan's factory warranty.
- Product Specifications
- Other Name: Piston-W/Pin
- Replaced by: A2010-5S662
- Lookup Code: 12010
- Item Weight: 1.20 Pounds
- Item Dimensions: 3.8 x 3.7 x 3.4 inches
- Condition: New
- Fitment Type: Direct Replacement
- Require Quantity: 3
- SKU: A2010-2Z061
- Warranty: This genuine part is guaranteed by Nissan's factory warranty.
- Product Specifications
- Other Name: Piston-W/Pin
- Replaced by: A2010-5S602
- Lookup Code: 12010
- Item Weight: 1.20 Pounds
- Item Dimensions: 3.6 x 3.6 x 3.1 inches
- Condition: New
- Fitment Type: Direct Replacement
- Require Quantity: 3
- SKU: A2010-2Z002
- Warranty: This genuine part is guaranteed by Nissan's factory warranty.
- Product Specifications
- Other Name: Piston-W/Pin
- Replaced by: A2010-5S601
- Lookup Code: 12010
- Item Weight: 1.20 Pounds
- Item Dimensions: 3.9 x 3.6 x 3.4 inches
- Condition: New
- Fitment Type: Direct Replacement
- Require Quantity: 3
- SKU: A2010-2Z001
- Warranty: This genuine part is guaranteed by Nissan's factory warranty.
| Page 1 of 2 |Next >
1-20 of 21 Results
2001 Nissan Quest Piston
Committed to delivering top-notch quality at affordable prices, our website is your go-to source for OEM 2001 Nissan Quest Piston worldwide. Each of our genuine 2001 Nissan Quest Piston come with a manufacturer's warranty, so rest assured, quality and cost are covered. With us, you're making a smart choice that stands the test of time.
2001 Nissan Quest Piston Parts Questions & Experts Answers
- Q:What steps should be taken before installing the piston and connecting rod assemblies on 2001 Nissan Quest?Posted by Katherine D.A:Before tightening the fasteners for the piston and connecting rod assemblies, the following should be observed; the cylinder walls should be free from dirt, the top edge of every cylinder should be chamfered, and the crankshaft fitted. Withdraw the cap on the number one connecting rod with a lot of attention to some signs made at some period, and exclude any contact of the bearing surfaces with the fingers' palms. Inspect it in terms of the oil clearance of the connecting rod bearings by removing the upper bearing insert from the new one and cleaning the back side of that insert and then put it into the connecting rod to see that tab fits into the recess without the use of the lubricant. The same must be done to the lower bearing insert in the rod cap. Align the gaps of the piston rings to the time interval recommended by the manufacturer, and then apply a drop of clean engine oil on the piston and the rings, position a piston ring compressor and leave the skirt part out slightly. Turn the crankshaft to make the number one connecting rod journal reach the extreme lower position and lubricate the cylinder bore. Reinstall the piston/connecting rod assembly in the cylinder bore with the notch on the top of the piston facing the timing belt end, if the crankshaft sprocket and the cambelt were removed. Lightly knock the ring compressor such that it comes in contact with the block and slowly push the piston over the cylinder while positioning theconnecting rod onto the crankshaft journal without completely applying force on the components. The connecting rod bearing oil clearance should be checked after installation by using the Plastigage, marked on the cylinder wall and the mating surfaces of the rod cap should also match. Finally, turn the nuts to the stated torque in steps before undoing the rod cap to compare the crushed Plastigage against the scale to check the clearance. If the clearance is still off, then look for interference or wipe with oil and re-measure the journal diameter. Any Plastigage residue needs to be removed gently, and a thin layer of fresh grease has to be spread over the bearing's surfaces; then the connecting rod and the cap should be fitted back in place and the nuts tightened to the prescribed level. Perform the same procedure for the other assemblies until through with it, make use of a clean piece of cloth on the bearing surfaces, must align the piston/rod correctly, lubricate the cylinder walls and bearing faces where necessary. After all assemblies are installed place the crankshaft in position to check for binding, and last, check the connecting rod end play, if the end play is out of specification then resize it or use new connecting rods.Answered by Nissan Parts Specialist Timothy / Jan 09, 2025
Related 2001 Nissan Quest Parts
 2001 Nissan Quest Crankshaft Gear
 2001 Nissan Quest Crankshaft Pulley
 2001 Nissan Quest Crankshaft
 2001 Nissan Quest Alternator Bracket