×
- Hello
- Login or Register
- Quick Links
- Live Chat
- Track Order
- Parts Availability
- RMA
- Help Center
- Contact Us
- Shop for
- Nissan Parts
- Nissan Accessories

My Garage
My Account
Cart
Genuine 1986 Nissan 300ZX Transmission Assembly
Trans Assembly- Select Vehicle by Model
- Select Vehicle by VIN
Select Vehicle by Model
orMake
Model
Year
Select Vehicle by VIN
For the most accurate results, select vehicle by your VIN (Vehicle Identification Number).
15 Transmission Assemblies found
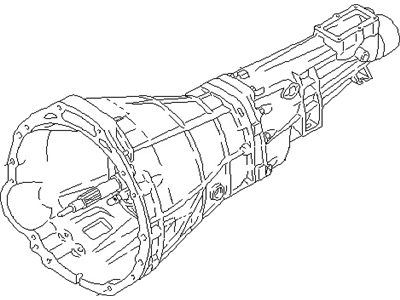
1986 Nissan 300ZX Manual Transmission
Part Number: 32010-19P60$1720.86 MSRP: $2243.63Limited AvailabilityYou Save: $522.77 (24%)Product Specifications- Other Name: Transmission Assy
- Manufacturer Note: FS5W71C
- Replaced by: 32010-19P61
- Lookup Code: 32010
- Item Weight: 157.70 Pounds
- Item Dimensions: 37.8 x 18.7 x 14.9 inches
- Condition: New
- Fitment Type: Direct Replacement
- SKU: 32010-19P60
- Warranty: This genuine part is guaranteed by Nissan's factory warranty.
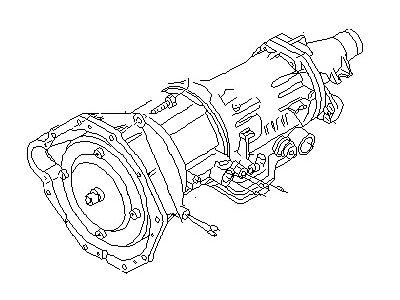
1986 Nissan 300ZX Automatic Transmission
Part Number: 31020-X8062$3168.30 MSRP: $3835.71Limited AvailabilityYou Save: $667.41 (18%)Product Specifications- Other Name: Transmission-Auto
- Manufacturer Note: E4N71B
- Replaced by: 31020-X8101
- Lookup Code: 31020
- Item Weight: 247.20 Pounds
- Item Dimensions: 40.4 x 21.6 x 18.4 inches
- Condition: New
- Fitment Type: Direct Replacement
- SKU: 31020-X8062
- Warranty: This genuine part is guaranteed by Nissan's factory warranty.
- Product Specifications
- Other Name: Transmission Assy
- Manufacturer Note: FS5W71C
- Lookup Code: 32010
- Item Weight: 126.30 Pounds
- Item Dimensions: 42.4 x 20.4 x 20.4 inches
- Condition: New
- Fitment Type: Direct Replacement
- SKU: 32010-19P63
- Warranty: This genuine part is guaranteed by Nissan's factory warranty.
- Product Specifications
- Other Name: Transmission
- Manufacturer Note: FS5W71C
- Replaces: 32010-01P10, 32010-19P60, 32010-01P00, 32010-01P11
- Lookup Code: 32010
- Item Weight: 156.20 Pounds
- Item Dimensions: 36.7 x 18.7 x 15.1 inches
- Condition: New
- Fitment Type: Direct Replacement
- SKU: 32010-19P61
- Warranty: This genuine part is guaranteed by Nissan's factory warranty.
- Product Specifications
- Manufacturer Note: FS5W71C
- Replaced by: 32010-19P61
- Lookup Code: 32010
- Item Weight: 157.70 Pounds
- Item Dimensions: 37.4 x 18.4 x 15.2 inches
- Condition: New
- Fitment Type: Direct Replacement
- SKU: 32010-01P11
- Warranty: This genuine part is guaranteed by Nissan's factory warranty.
- Product Specifications
- Manufacturer Note: FS5W71C
- Replaced by: 32010-19P61
- Lookup Code: 32010
- Item Weight: 157.70 Pounds
- Item Dimensions: 36.4 x 18.4 x 15.2 inches
- Condition: New
- Fitment Type: Direct Replacement
- SKU: 32010-01P10
- Warranty: This genuine part is guaranteed by Nissan's factory warranty.
- Product Specifications
- Other Name: Transmission Assy
- Manufacturer Note: FS5R30A
- Replaced by: 32010-23P10
- Lookup Code: 32010
- Item Weight: 152.60 Pounds
- Item Dimensions: 40.4 x 21.2 x 20.5 inches
- Condition: New
- Fitment Type: Direct Replacement
- SKU: 32010-23P00
- Warranty: This genuine part is guaranteed by Nissan's factory warranty.
- Product Specifications
- Other Name: Transmission Assy
- Manufacturer Note: FS5W71C
- Replaced by: 32010-24P70
- Lookup Code: 32010
- Item Weight: 118.20 Pounds
- Item Dimensions: 40.8 x 21.5 x 21.0 inches
- Condition: New
- Fitment Type: Direct Replacement
- SKU: 32010-21P10
- Warranty: This genuine part is guaranteed by Nissan's factory warranty.
- Product Specifications
- Other Name: Transmission-Auto; Transmission
- Manufacturer Note: E4N71B
- Replaces: 31020-X8075
- Lookup Code: 31020
- Item Weight: 176.80 Pounds
- Item Dimensions: 40.4 x 21.7 x 19.8 inches
- Condition: New
- Fitment Type: Direct Replacement
- SKU: 31020-X8084
- Warranty: This genuine part is guaranteed by Nissan's factory warranty.
- Product Specifications
- Manufacturer Note: E4N71B
- Replaced by: 31020-X8084
- Lookup Code: 31020
- Item Weight: 187.00 Pounds
- Item Dimensions: 41.6 x 21.7 x 19.4 inches
- Condition: New
- Fitment Type: Direct Replacement
- SKU: 31020-X8075
- Warranty: This genuine part is guaranteed by Nissan's factory warranty.
- Product Specifications
- Other Name: Transmission Assembly-Auto; Transmission
- Manufacturer Note: E4N71B
- Lookup Code: 31020
- Item Weight: 185.40 Pounds
- Item Dimensions: 40.3 x 20.9 x 20.0 inches
- Condition: New
- Fitment Type: Direct Replacement
- SKU: 31020-X8206
- Warranty: This genuine part is guaranteed by Nissan's factory warranty.
- Product Specifications
- Other Name: Transmission-Auto
- Manufacturer Note: E4N71B
- Replaces: 31020-X8062
- Lookup Code: 31020
- Item Weight: 244.80 Pounds
- Item Dimensions: 40.4 x 21.8 x 19.1 inches
- Condition: New
- Fitment Type: Direct Replacement
- SKU: 31020-X8101
- Warranty: This genuine part is guaranteed by Nissan's factory warranty.
- Product Specifications
- Other Name: Transmission
- Manufacturer Note: FS5R90A(T-5)
- Replaces: 32010-03P01, 32010-03P03
- Lookup Code: 32010
- Item Weight: 110.20 Pounds
- Item Dimensions: 40.4 x 16.3 x 15.2 inches
- Condition: New
- Fitment Type: Direct Replacement
- SKU: 32010-03P04
- Warranty: This genuine part is guaranteed by Nissan's factory warranty.
- Product Specifications
- Other Name: Transmission Assembly-Automatic; Transmission
- Manufacturer Note: E4N71B
- Lookup Code: 31020
- Item Weight: 189.00 Pounds
- Item Dimensions: 41.6 x 21.3 x 18.7 inches
- Condition: New
- Fitment Type: Direct Replacement
- SKU: 31020-X8203
- Warranty: This genuine part is guaranteed by Nissan's factory warranty.
- Product Specifications
- Other Name: Transmission-Auto; Transmission
- Manufacturer Note: E4N71B
- Lookup Code: 31020
- Item Weight: 178.50 Pounds
- Item Dimensions: 41.6 x 21.3 x 20.0 inches
- Condition: New
- Fitment Type: Direct Replacement
- SKU: 31020-X8179
- Warranty: This genuine part is guaranteed by Nissan's factory warranty.
1986 Nissan 300ZX Transmission Assembly
Committed to delivering top-notch quality at affordable prices, our website is your go-to source for OEM 1986 Nissan 300ZX Transmission Assembly worldwide. Each of our genuine 1986 Nissan 300ZX Transmission Assembly come with a manufacturer's warranty, so rest assured, quality and cost are covered. With us, you're making a smart choice that stands the test of time.
1986 Nissan 300ZX Transmission Assembly Parts Questions & Experts Answers
- Q:How to disconnect and remove the manual Transmission Assembly from a 1986 Nissan 300ZX?Posted by Gunther H.A:Disconnect the negative cable at the battery and place it out of the way to prevent accidental contact with the negative terminal. Raise the vehicle and support it at all four corners with jackstands, ensuring it is high enough for the transmission to be slid out from underneath. Remove the console from inside the vehicle. For those equipped with a FS5W71C transmission (non-turbo), take off the shift lever by removing the large snap-ring retaining the shifter ball; for FS5R90A models, remove the shifter by taking out the four retaining bolts and lifting it off. From underneath, remove the exhaust front tube, catalytic converter, and crossover connecting pipe. Disconnect the six retaining bolts to remove the catalytic converter heat shield. Disconnect the wires from the back-up light switch, top gear switch, neutral switch, or overdrive switch at the transmission, marking the connectors for identification. Disconnect the speedometer cable at the transmission and drain the oil from it. Remove the driveshaft, the exhaust pipe support bracket, and unbolt the clutch operating cylinder, tying it back out of the way. Support the engine under the oil pan with a jack and a block of wood, avoiding the drain plug. Place a jack under the transmission, then remove the transmission mounting insulator nuts and the mounting-to-frame bolts. Take out the starter motor from the bellhousing and remove the bolts securing the bellhousing to the engine, laying them out in order for reinstallation. Lower both jacks simultaneously until the transmission can be withdrawn to the rear and removed from beneath the vehicle, ensuring the weight does not hang on the input shaft while still engaged with the clutch plate splines. Installation is the reverse of removal; apply a small amount of grease on the input shaft splines and check the clutch mechanism alignment. Finally, check the clutch pedal free travel and adjust if necessary, remembering to fill the transmission with the correct grade and quantity of lubricant.Answered by Nissan Parts Specialist Glenn / Nov 04, 2024
Related 1986 Nissan 300ZX Parts
 1986 Nissan 300ZX Torque Converter
 1986 Nissan 300ZX Valve Body
 1986 Nissan 300ZX Needle Bearing
 1986 Nissan 300ZX Transmission Pan