×
- Hello
- Login or Register
- Quick Links
- Live Chat
- Track Order
- Parts Availability
- RMA
- Help Center
- Contact Us
- Shop for
- Nissan Parts
- Nissan Accessories
My Garage
My Account
Cart
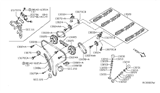
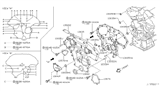
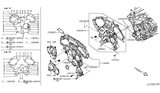
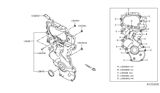
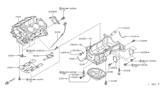
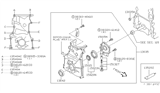
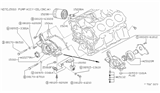
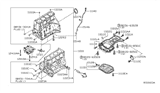
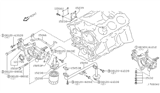
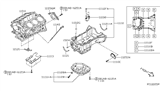
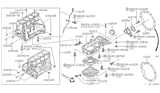
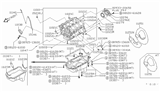
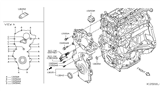
Genuine Nissan Crankshaft Seal
- Select Vehicle by Model
- Select Vehicle by VIN
Select Vehicle by Model
orMake
Model
Year
Select Vehicle by VIN
For the most accurate results, select vehicle by your VIN (Vehicle Identification Number).
110 Crankshaft Seals found


Nissan O Ring Seal
Part Number: 15066-6N204$6.20 MSRP: $8.74You Save: $2.54 (30%)Ships in 1-2 Business DaysProduct Specifications- Other Name: Seal-O Ring; Timing Cover Seal


Nissan Seal-Oil,Crankshaft Front
Part Number: 13510-31U10$18.31 MSRP: $25.86You Save: $7.55 (30%)Ships in 1-3 Business DaysProduct Specifications- Position: Driver Side
- Replaces: 13510-31U00


Nissan Seal-Oil,Crankshaft Front
Part Number: 13510-7Y000$25.74 MSRP: $36.35You Save: $10.61 (30%)Ships in 1-2 Business DaysProduct Specifications- Position: Front

Nissan Seal-Oil,Crankshaft Front
Part Number: 13510-9HP0A$15.83 MSRP: $21.82You Save: $5.99 (28%)Ships in 1-3 Business DaysProduct Specifications- Position: Front


Nissan Seal O Ring
Part Number: 15066-ZW80A$5.70 MSRP: $8.04You Save: $2.34 (30%)Ships in 1 Business DayProduct Specifications- Other Name: Seal-O Ring; Rear Seal, Timing Cover Seal
- Manufacturer Note: 150663RC6A
- Replaces: 15066-EN200


Nissan Seal-Oil CRANKSHAFT Front
Part Number: 13510-1LA0A$14.76 MSRP: $20.35You Save: $5.59 (28%)Ships in 1-2 Business DaysProduct Specifications- Other Name: Seal-Oil,Crankshaft Front
- Position: Front
- Replaces: 13510-6N210, 13510-6N200


 Product Specifications
- Other Name: Seal-Oil,Crankshaft Front
- Manufacturer Note: NDK
- Position: Front


Nissan Retainer Assy-Oil Seal,Rear
Part Number: 12296-JA10A$37.81 MSRP: $52.12You Save: $14.31 (28%)Ships in 1-3 Business DaysProduct Specifications- Other Name: Rear Main Seal, Rear Main Seal Retainer
- Position: Rear


Nissan Seal-Oil,CRANKSHAFT Rear
Part Number: 12279-3TS0A$40.26 MSRP: $58.32You Save: $18.06 (31%)Ships in 1 Business DayProduct Specifications- Other Name: Crankshaft Seal, Rear Main Seal, Seal
- Position: Rear
- Replaces: 12279-AD200, 12279-3TA0A, 12279-1LA0A


Nissan Retainer Assy-Oil Seal,Rear
Part Number: 12296-31U20$56.00 MSRP: $79.10You Save: $23.10 (30%)Ships in 1-3 Business DaysProduct Specifications- Other Name: Rear Main Seal Retainer
- Position: Rear
- Replaces: 12296-31U10, 12296-31U15, 12296-31U11, 12296-31U00, 12296-31U01


Nissan Seal-Oil,Crankshaft Front
Part Number: 13510-10Y10$12.40 MSRP: $17.52You Save: $5.12 (30%)Ships in 1-2 Business DaysProduct Specifications- Position: Front
- Replaced by: 13510-10Y12


Nissan Seal-Oil,Crankshaft Front
Part Number: 13510-53J10$18.95 MSRP: $26.12You Save: $7.17 (28%)Ships in 1-3 Business DaysProduct Specifications- Position: Front
- Replaces: 13510-53J00, 13510-40F10, 13510-40F00


Nissan Seal-Oil,Crankshaft Front
Part Number: 13510-88G00$7.53 MSRP: $10.38You Save: $2.85 (28%)Ships in 1-3 Business DaysProduct Specifications- Other Name: Front Crank Seal
- Manufacturer Note: NOK
- Position: Front
- Replaces: 13510-88G10, 13510-V5000, 13510-18V10, 13510-16A00, 13510-D0100


Nissan Seal-Oil,CRANKSHAFT Rear
Part Number: 12279-4Z001$37.40 MSRP: $54.17You Save: $16.77 (31%)Ships in 1-2 Business DaysProduct Specifications- Other Name: Rear Main Seal, Seal
- Position: Rear
- Replaces: 12279-4Z000


Nissan Seal-Oil,Crankshaft Front
Part Number: 13510-10Y12$12.40 MSRP: $17.52You Save: $5.12 (30%)Ships in 1-2 Business DaysProduct Specifications- Manufacturer Note: NDK
- Position: Front
- Replaces: 13510-10Y00, 13510-V7201, 13510-10Y10


Nissan Retainer Assy-Oil Seal,Rear
Part Number: 12296-9HP0A$51.43 MSRP: $70.90You Save: $19.47 (28%)Ships in 1-2 Business DaysProduct Specifications- Other Name: Rear Main Seal, Rear Main Seal Retainer
- Position: Rear


Nissan Seal-Oil,CRANKSHAFT Rear
Part Number: 12279-2B500$33.86 MSRP: $49.03You Save: $15.17 (31%)Ships in 1-3 Business DaysProduct Specifications- Other Name: Rear Main Seal
- Position: Rear
- Replaces: 12279-21000, 12279-2B501, 12279-R4600, 12279-58S00, 12279-A4600, 12279-R4601, 12279-01M00, 12279-85G00, 12279-42L00, 12279-21010


Nissan RETAINER-Oil
Part Number: 12297-F6500$45.69 MSRP: $62.98You Save: $17.29 (28%)Ships in 1-2 Business DaysProduct Specifications- Other Name: Retainer-Oil Seal,Rear; Rear Main Seal, Rear Main Seal Retainer
- Replaces: 12297-V5000, 12296-V5000


Nissan Seal-Oil,Crankshaft Front
Part Number: 13510-1KC1A$11.50 MSRP: $15.85You Save: $4.35 (28%)Ships in 1-3 Business DaysProduct Specifications- Manufacturer Note: 135106N200
- Position: Front

Nissan Seal-Oil,Crankshaft Front
Part Number: 13510-1KT0A$11.24 MSRP: $15.50You Save: $4.26 (28%)Ships in 1-3 Business DaysProduct Specifications- Other Name: Crankshaft Seal, Front Crank Seal, Front Seal
- Position: Front
| Page 1 of 6 |Next >
1-20 of 110 Results
Nissan Crankshaft Seal Parts Questions & Experts Answers
- Q: How to replace a rear crankshaft seal on 4 cylinder Nissan Altima?A:Remove the transaxle and then take out the flywheel/driveplate. Use a screwdriver wrapped with tape to pry the Crankshaft Seal out, being careful not to gouge or nick the housing. Lubricate the crankshaft seal journal and the lip of the new Crankshaft Seal with multi-purpose grease. Install the Crankshaft Seal with the seal lip toward the engine and the dust seal toward the transmission. Tap the Crankshaft Seal into place using a seal driver to ensure it doesn't become tilted. Install the Crankshaft Seal so that its rear edge is flush with the face of the engine block or up to 0.020 inch recessed. The remaining steps are the reverse of removal. Reconnect the battery and perform the necessary re-learn procedures.
- Q: How to replace the rear Crankshaft Seal and rear oil seal retainer on 2.4L four cylinder Nissan Frontier?A:Remove the transmission. Remove the flywheel/driveplate. Remove the rear Crankshaft Seal retainer from the block by unbolting the rear Crankshaft Seal retainer from the engine block and oil pan. Scrape any sealant or gasket material from the retainer, oil pan and the block. Position the seal and retainer assembly between two wood blocks, to evenly support the aluminum housing, and drive the old seal out with a hammer and punch. A screwdriver can also be used to pry the seal out, being careful not to gouge or nick the housing during seal removal. Place the new seal squarely on the retainer and drive it into the retainer with a wood block or a section of pipe slightly smaller in diameter than the outside diameter of the seal. Lubricate the crankshaft seal journal and the lip of the new seal with multi-purpose grease. Apply a continuous 1/8-inch bead of RTV sealant around the perimeter of the seal retainer. Also apply sealant to the bottom of the retainer (oil pan mating surface). Slowly and carefully push the seal onto the crankshaft. The seal lip is stiff, so work it onto the crankshaft with a smooth object such as the end of a socket extension as you push the retainer against the block. Install and tighten the retainer bolts securely. The remaining steps are the reverse of removal.
- Q: How to remove and replace the front crankshaft seal on a Nissan Murano?A:Remove the crankshaft pulley. While removing the seal, one should use seal removal tool or any available large screwdriver with an effort not to spoil the seal bore or the crankshaft of the car. Do not scrape, cut, or mar any portion of the seal mating surface as this will result to leakage of the oil. It is then necessary to clean up the bore to ensure there is no old seal material and corrosion; place the new seal with the lip side inwards towards the engine. This practice also implies that a small amount of oil should be applied to the outer edge of the new seal for easier installation. Insert the seal into the bore with a large socket and hammer where the outside of the socket is as wide as the inside of the case and drive the new seal in until it has a flat face against the bottom of the case. Look at the face of the damper where the oil seal touches it; if it has a groove due to long contact with the former seal, the new one will have a tendency to leak, therefore, requiring the crankshaft pulley. Coat the seal lips with engine oil before replacing the crankshaft pulley and fastening it with the bolt, tighten this bolt to the specified tension. Proceed and perform the removal step reversals to complete the installation then start the engine and inspect for signs of oil leaking.


Related Nissan Parts
 Nissan Camshaft Position Sensor
 Nissan Coolant Temperature Sensor
 Nissan Belt Tensioner Bolt
 Nissan Camshaft Seal
 Nissan Crankshaft
 Nissan Alternator Bracket
Browse by Model
200SX Crankshaft Seal 240SX Crankshaft Seal 280ZX Crankshaft Seal 300ZX Crankshaft Seal 350Z Crankshaft Seal 370Z Crankshaft Seal 720 Pickup Crankshaft Seal Altima Crankshaft Seal Armada Crankshaft Seal Axxess Crankshaft Seal Cube Crankshaft Seal Datsun 310 Crankshaft Seal Datsun 810 Crankshaft Seal Frontier Crankshaft Seal GT-R Crankshaft Seal Hardbody Pickup (D21) Crankshaft Seal Hardbody Pickup (D21U) Crankshaft Seal Juke Crankshaft Seal Kicks Crankshaft Seal Kicks Play Crankshaft Seal Maxima Crankshaft Seal Murano Crankshaft Seal NV Crankshaft Seal Pathfinder Crankshaft Seal Pulsar NX Crankshaft Seal Quest Crankshaft Seal Rogue Crankshaft Seal Rogue Sport Crankshaft Seal Sentra Crankshaft Seal Stanza Crankshaft Seal Titan Crankshaft Seal Van Crankshaft Seal Versa Crankshaft Seal Versa Note Crankshaft Seal Xterra Crankshaft Seal Z Crankshaft Seal